This article looks at what causes and how to fix the “Host Process for Windows Services Has Stopped Working” error in Windows.
The error message isn’t a strange error in Windows, especially since several users have complained about experiencing it. Since the error lacks any code or descriptive information, it is difficult to know what causes it.
Pro Tip: You can clean, speed up and protect your computer with a quality PC repair tool to get your computer running fast and smooth. It will diagnose your Windows operating system to locate junk files, speed-reducing problems, and causes of system crashes. This tool will help you to fix the Host Process for Windows Service Has Stopped Working error on Windows 10.
What Causes the “Host Process for Windows Services Has Stopped Working” Error?
Several users have noted that the “Host Process for Windows Services has Stopped working” is a Windows operating system error. This message usually occurs randomly. When the host process error is occurring, you may also notice a considerable drop in your Internet connection.
Most users report seeing this error after a Windows update. This error might occur when a program is incompatible (usually third party) with your PC and the Windows OS. For instance, this issue could affect various operational setups, such as remote work environments where laptops shipped to employers safely are crucial for seamless productivity.
Other causes of the error include:
- Incomplete Windows update patches
- Incompatible third-party programs (such as printers and AV programs)
- Corrupted registry files
- Malware in your computer
- Corrupted memory
Note: Some Windows users have related the error to printer problems. Check the printer’s registry on the computer.
How to Fix Host Process for Windows Services Has Stopped Working
How to resolve the Host Process for Windows Services Has Stopped Working issue
Preliminary Workarounds
- Reboot and try to print again and see if the problem has been solved.
- Disable any firewall program on your PC. If there is any, then try again to print the document you’re printing.
- Disconnect any printer that is connected to your computer.
If these solutions do not fix the Host Process for Windows Services Has Stopped Working, you may proceed to the following technical solutions.
Note: Before you begin using these solutions, make sure you create a Windows restore point just in case something goes wrong.
Fix #1: Uninstall Third-Party Antivirus Programs
Some sensitive antivirus can give false positives that can stop the program you are running. If, after disabling the antivirus software you still see the error result, uninstalling it may be the solution.
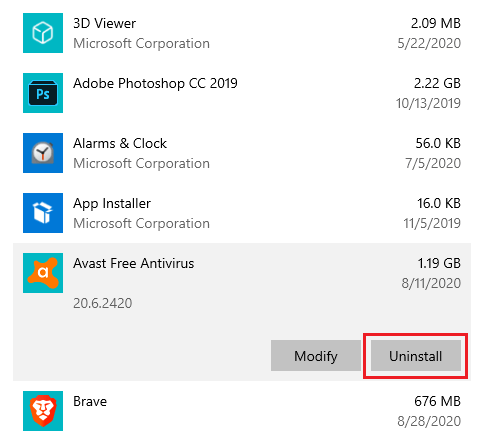
Before you remove the program, conduct a full system scan to make sure that no malware is interfering with your system operations and causing the host process error.
Doing so will help remove the particular malware and other related malware programs. Additionally, you can update drivers that may be causing the host process issue on your PC. You can do it through the Device Manager or using a driver updater tool that will automatically update all the device drivers.
Fix #2: Start the Computer in Safe Mode
This will boot your PC in Safe Mode. Safe mode shuts down every non-essential application during Windows launch and ensures that only the most stable drivers are running. It also ensures that non-essential processes do not start during the Windows Launch and it disables non-core components.
To start your PC on Safe Mode:
- Click the Start button.
- Select the Power icon.
- Press the Shift key down and click Restart.
- On the new menu select Troubleshoot > Advanced Options > Startup Settings.
- Click the Restart.
- Your computer will reboot, presenting you with a menu. Selection option 4 to select Enable Safe Mode (or option 5 to select Safe Mode with Networking).
In Safe Mode, you can either run your anti-malware software to remove the malware that could be causing the problem. You may also uninstall a recent Windows update that may be causing the malfunction.
Launching your PC in Safe Mode can also be helpful if you face such issues like error 0x80070091 or error code 0x8007045d.
Fix #3: Locate and Repair Incompatible Programs Causing the Error
Because the host process error often happens due to incompatibility between an application on your PC and the Windows OS.
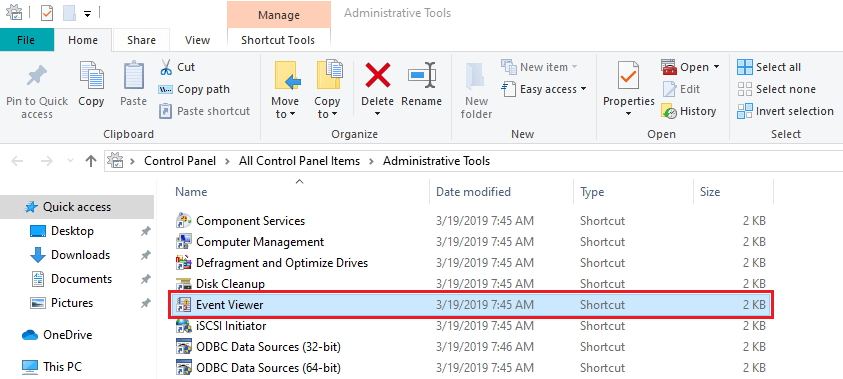
You first need to determine the program that is causing the host process problem. To do this you will view the Event Logs on your PC. Here’s how:
- Go to the Control panel (In Windows 10 Press Win + S then type
control panel). - Click Administrative Tools (on Classic view) or System and Maintenance (in normal view).
- Click Event Viewer (in Classic view) or View event logs (in normal view).
- Navigate through the Windows Logs folder and locate the Application and System logs.
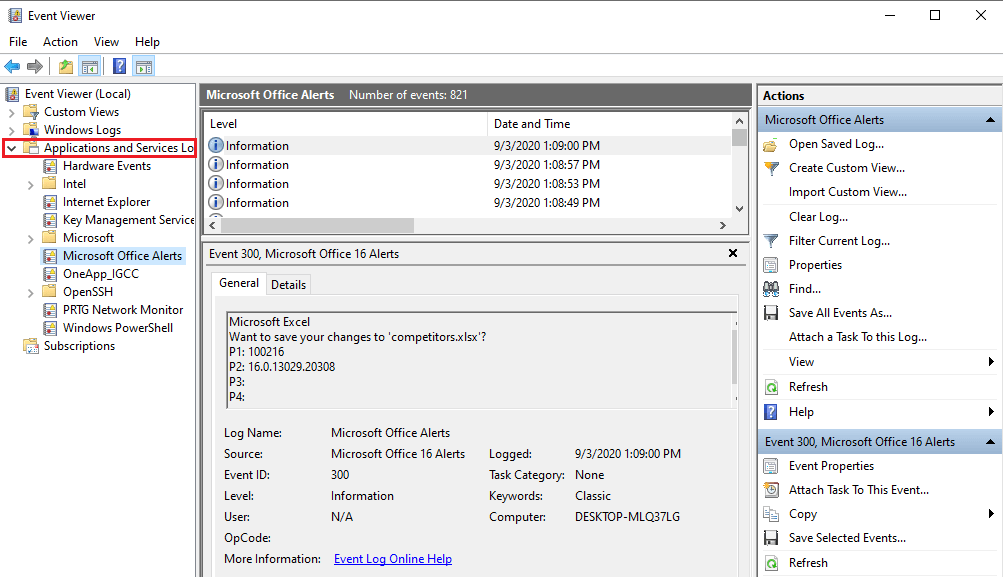
- Locate events that have red X’s next to them and with the word Error. Some of the errors may also have the message, “Host process for Windows has stopped working.“
These events should be occurring around the same time or Just before the “Host process for Windows stopped working” error message occurred. - Once you locate the programs causing the issue, you can proceed to the solutions that can help you fix the problem. You can update them or uninstall them.
Fix #4: Perform a Clean System Boot
A clean boot helps to troubleshoot software compatibility issues. If you notice that the host process error is occurring because of third party software, you may need to perform a clean boot to give the system a complete shutdown.
This will allow you to diagnose the problem in a step-by-step manner by removing 3rd party applications that are loaded and launching on startup. Now that we have discussed about the Clean boot let’s see how to perform it.
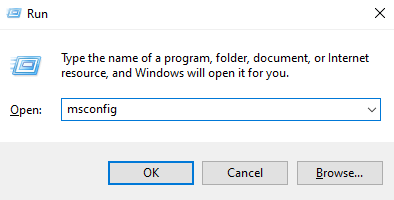
- Press Win + R.
- Type
msconfigand click OK.
- Under the General tab, ensure ‘Selective startup’ is checked.
- Under the selective startup tab, uncheck ‘Load startup items.’
- Select Service tab and check the box ‘Hide all Microsoft services.’
- Click ‘Disable all’ to disable all the unnecessary services that might be causing the conflict.

- On the Startup tab, click ‘Open Task Manager.’
- In the Task Manager disable all the enabled startup items.

- Click OK, then Restart your PC.
This process should give you a clue of which processes are causing the problem. If no startup process is causing the problem then it could be related to Microsoft services.
Performing a clean boot also helps resolve errors that are not easily resolved by common fixes. For instance, BSOD errors, such as 0x80004003, often result in a boot loop that makes them impossible to resolve. Doing a clean boot interrupts the boot loop and lets your computer load in an environment that allows troubleshooting.
Fix #5: Run System Restore
To run system restore
- Press Win + R.
- In the dialogue box, type
sysdm.cplthen press Enter.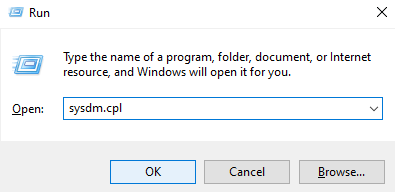

- Select System Protection tab.
- In the tab choose System Restore.
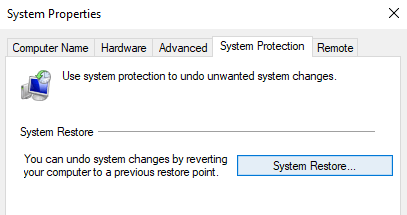

- Click Next then choose the desired System Restore point.
- Follow the on-screen instruction to complete the system restore process.
- After system restoration, reboot your computer and see if it has stopped working, if the process fixed the Host Process for Windows Services.
Take a note, system restore is a useful function that can perfectly solve system malfunctions like Windows Shell Experience host error or multiple RuntimeBroker.exe processes in Task Manager.
Fix #6: Repair Corrupted BITS Files
Most users report getting this error message after the Windows update. This can be because of a corrupted BITS (Background Intelligent Transfer Service) file. If this is the case, you will need to repair the BITS files to fix the Host Process for Windows Services has stopped working.
To repair BITS files:
- Press Win + R.
- In the dialog box type (or copy and paste) this:
\Programdata\Microsoft\network\downloader - Press Enter.
- Click Continue to allow the process to run.
- In the Downloader folder, delete any file that begins with Qmgr, for instance, Qmgr0.dat, Qmgr1.dat etc.
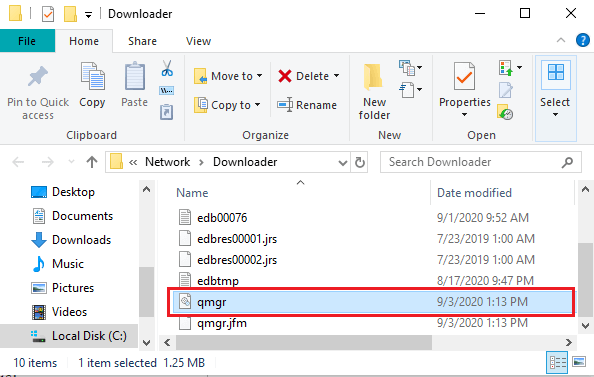

- After deleting the files, run Windows update (immediately).
Reboot your system after the Windows update and check if this solution helps to fix the error.