The Windows System Restore feature allows users to return to a previous state (restore point) if one was created beforehand.
This is quite helpful because users can revert system changes that may have caused PC slowness, errors, frequent crashes, and other malfunctions.
However, several Microsoft community users have reported receiving the “Error 0x80070091 Windows 10 System Restore” message when attempting to perform a system restore.
This error message typically appears as
“System Restore did not complete successfully. Your computer’s system files and settings were not changed” on the screen or “an unspecified error occurred during System Restore 0x80070091”.
Many users who have tried to restore their PC to an earlier restore point have reported the error notification below:
“System Restore failed while restoring the directory from the restore point.Source: AppxStaging
Destination: %ProgramFiles%\WindowsApps
An unspecified error occurred during System Restore. (0x80070091)“
However, in this article, you’ll find five proven solutions that will help you fix whatever error code 0x80070091 issues you may be having.
Five Solutions to Fix the Windows Restore Error 0x80070091
Solution 1: Rename the WindowsApps Folder in Safe Mode
Step 1: Use the Win + R shortcut to open the Run dialog box.
Step 2: Input msconfig in the Run box and hit the Enter key to open a pop-up window.
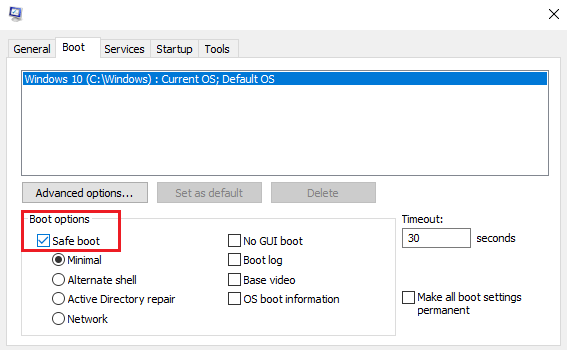
Step 3: Navigate to the Boot pane, tick the Safe boot option, and click on OK.
Step 4: Now, restart your PC to enter into Safe Mode.
Step 5: Input cmd in the Windows search bar, right-click on the Command Prompt option, and run as administrator.
Step 6: In the Command Prompt window, input the following commands; hit the Enter key after each command:
cd C:\Program Files
takeown /f WindowsApps /r /d Y
icacls WindowsApps /grant “%USERDOMAIN%\%USERNAME%”:(F) /t
attrib WindowsApps -h
rename WindowsApps WindowsApps.old
Step 7: Find your way back to (Step: 3) above, but this time, untick the Safe boot option to restart your system.
Wait for your PC to be fully restarted, then attempt to perform a System Restore to confirm if the error code 0x80070091 issue has been fixed.
Solution 2: Rename the WindowsApps Folder in Windows Recovery Environment
Step 1: Use the Win + I shortcut to launch the Settings app.
Step 2: In the Settings window, click on the Update & Security option.
Step 3: In the left pane, click on the Recovery option.
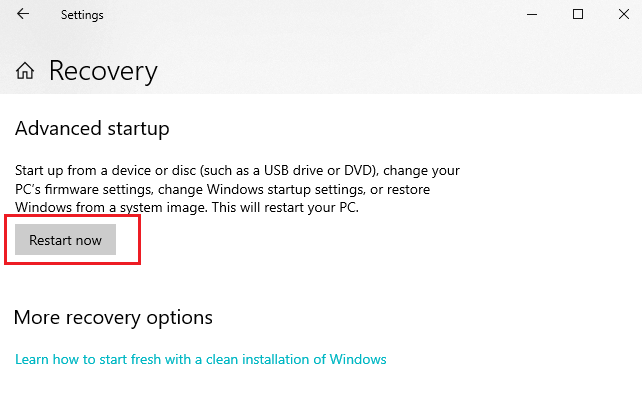
Step 4: In the right pane, locate the Advanced startup section, and click on Restart now.
Step 5: Your PC will restart and a menu will be displayed on a blue screen.
Step 6: In the displayed menu, click the Troubleshoot option.
Step 7: In the Troubleshoot menu, click on Advanced options.
Step 8: Then, click on Command Prompt in the Advanced options window.
Step 9: In the Command Prompt window, input the following commands, and hit the Enter key after each command:
cd C:\Program Files
attrib WindowsApps -h
rename WindowsApps WindowsApps.old
Step 10: Restart your PC. Afterwards, attempt to run System Restore again to check whether the System Restore error has been resolved.
Solution 3: Check Your Antivirus Program
Although antivirus programs help to protect your PC from malware and security threats, they often interfere with certain system processes and block some applications from accessing required directories.
If the solutions above haven’t been able to resolve your error 0x80070091 issues, disabling or removing your antivirus software may be the required solution.
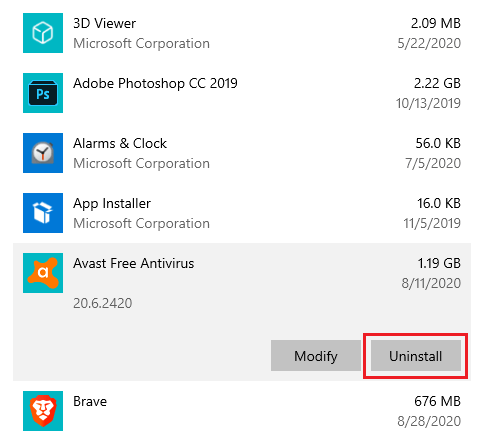
If error 0x80070091 is resolved after removing your antivirus software, you may want to switch to a different and more efficient antivirus program.
This solution can also help you to solve some Windows update errors like 0x80070422 or 0x80070002.
Solution 4: Perform a Chkdsk Scan
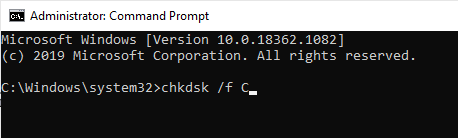
Step 1: Input cmd in the Windows search bar, right-click on the Command Prompt option, and run as administrator.
Step 2: In the Command Prompt window, input the following command:chkdsk /f X:Note: Replace “X” with your system drive letter and hit the Enter key.
Step 3: You’ll be prompted to schedule a disk scan at the next restart. Simply input Y and hit the Enter key to confirm.
Step 4: Restart your PC.
The chkdsk scan will take up to 15 minutes or more depending on the size of your drive. After the scan is complete, check to confirm if the error code 0x80070091 problem is still appearing.
Solution 5: Keep Your System up to Date
The Windows Restore error 0x80070091 can also appear if your system isn’t up to date. Although Windows automatically installs missing updates, it’s possible that you may have missed an update at one point or the other.
However, you can follow the steps below to manually check for missing updates:
Step 1: Use the Win + I shortcut to launch the Settings app.
Step 2: In the Settings window, click on the Update & Security option.

Step 3: In the right pane, click on the Check for updates option.
Finally, windows will check for available updates and download them in the background. Restart your PC after the update and check if the Windows Restore error 0x80070091 has been resolved.