Usually, when Windows 10 takes forever to boot, there are various reasons behind it. Moreover, this issue comes different forms. Sometimes, you’d have to wait for all the necessary applications to load. Perhaps, you end up staring at a black screen for minutes. These are just some of the signs that tell something’s wrong with your PC.
As we’ve mentioned, there can be various reasons behind the issue. So, the approach to speeding up the system will be different in each situation.
Instead of diving into the challenges of working with Command Prompt, use the PC Repair software by Outbyte. It’s great for detecting and removing temporary, corrupted, and junk files from your computer. As a result, you have improved PC performance in just a few easy steps.
Now, if you want to learn how to fix Windows 10 slow boot, check out the tips we’ve shared below.
What Are the Reasons Behind a Windows 10 Slow Startup?
Most commonly, your PC begins to load much slower when there are tons of third-party programs that are set up to run at startup. However, some users still experience a slow boot of Windows 10 even after removing all the unnecessary applications.

Some other reasons behind the issue include problems with the graphics card, low virtual memory, and even overheating. Depending on your computer build, you should resolve the issue from the source. You may even want to reset the system to fix the issue if there are multiple errors that are difficult to trace.
How to Fix Windows 10 Slow Boot
Software issues that cause Windows 10 to start slow are rather diverse. System errors, excessive applications, outdated drivers, low virtual memory, or startup settings can affect the speed of PC load.
Here, we’re breaking down the steps for fixing all of those issues. It’s also a good practice to look into the minor problems before jumping to more complicated stuff like resetting the entire system.
Look for System Errors
Sometimes, Windows 10 slow startup is caused by system errors. While you can check for them manually, scanning the entire system is time-consuming, and confusing for inexperienced PC users.
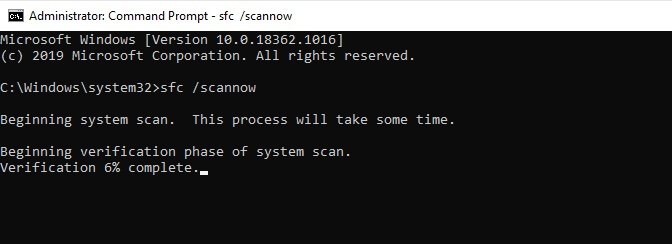
In case you want to manually search for system errors, you can run an SFC scan. Use Command Prompt to do it:
- Press Win + R to open the Run dialog menu. Type
cmdand hit Enter. Command Prompt must be run with Administrator rights to make the changes possible. - Type
sfc /scannowand press Enter. - You will get the information on whether the scan was able to find and delete any corrupted files.
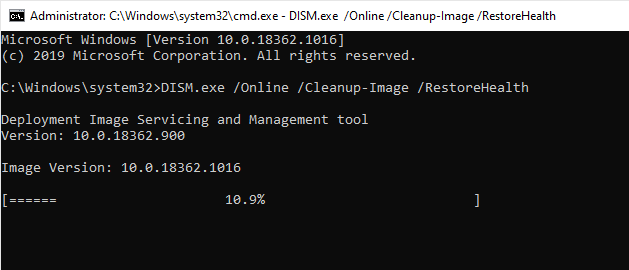
If there are any errors that the SFC scan was unable to fix, you can additionally run DISM:
- Open the Command Prompt once again run the following command:
DISM /Online /Cleanup-Image /RestoreHealthPress Enter. - You can also scan and check health beforehand but make sure you always restore health as the final step.
Disable Fast Startup
Fast startup is the option that is enabled in Windows operating system by default. It is recommended by the manufacturer as it supposedly helps to speed up Windows 10 boot. The option saves some information right before you shut down your PC.
So, the next time you turn it on the system loads faster. However, there are instances when fast startup only makes the process slower and keeps users waiting for minutes before everything is ready for work. If that’s your case, here’s how you can turn off the option:
- Press Win + S on your keyboard to open the Search dialog menu, and type
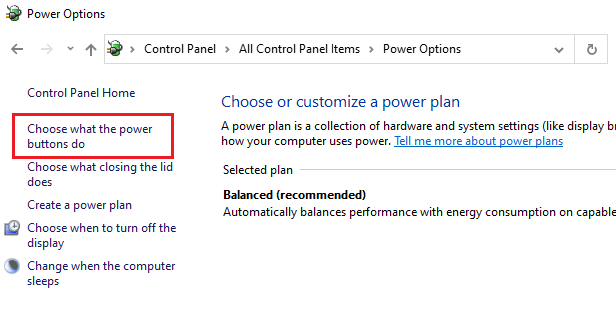
control panel. Choose Control Panel from the options. - Select Power Options from the list and click on the ‘Choose what the power buttons do’ option from the left-hand side menu.

- Next, you should click on Change settings that are currently unavailable line at the top section.
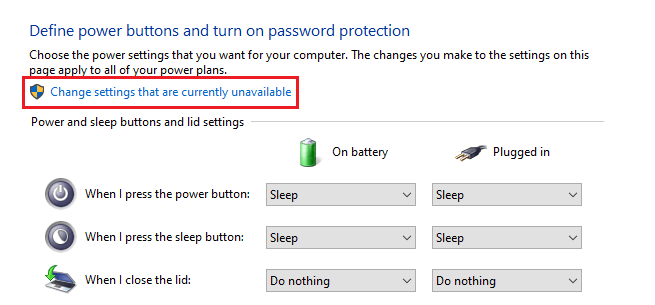
- Finally, check off the box next to Turn on fast startup (recommended) and save changes.
It’s possible that you won’t see the fast startup option on your PC. It may happen when hibernation is not enabled. You can use Command Prompt to fix this:
- Press Win + R to open the Run dialog box, type
cmd, and hit Enter. - On the command line, type
powercfg /hibernate on. Press Enter and go through the steps described above to disable fast startup.
Adjust Virtual Memory Settings
One of the other reasons for the slow boot of Windows 10 is the way your system uses virtual memory. Usually, when you have enough RAM, increased launch time is not an issue.
However, when RAM is used close to its limits, your PC needs virtual memory to run the processes. Check and adjust its size by following these steps:
- Press Win + R and type
cmdin the dialog box to open Command Prompt. - Type the following command to understand the current status of the paging file and press Enter:
wmic pagefile list /format:list - Turn off automatic size management of virtual management. To do that, run the following command:
wmic computersystem where name=”%computername%” set AutomaticManagedPagefile=FalseAfter you do this, Command Prompt will return you the message whether the change has taken place successfully. - Finally, set the minimum and the maximum size of the page file. For instance, this is what you should enter to assign values from 4 to 8 GB:
wmic pagefileset where name=”C:\pagefile.sys” set InitialSize=4096, MaximumSize=8192
Is your computer slow not only on startup but throughout its work? We have a great article about how to speed up Windows 10. Check it out to get more useful tips on boosting your PC functioning.
Remove Programs Running on Startup
Programs launching as soon as you turn on your PC are also accounted for the slow boot of Windows 10. Check the list of all such applications – it’s possible that you don’t need most of them running on startup. Whether you want to adjust their list, here’s what you should do:
- Right-click on the Start button and select Settings.
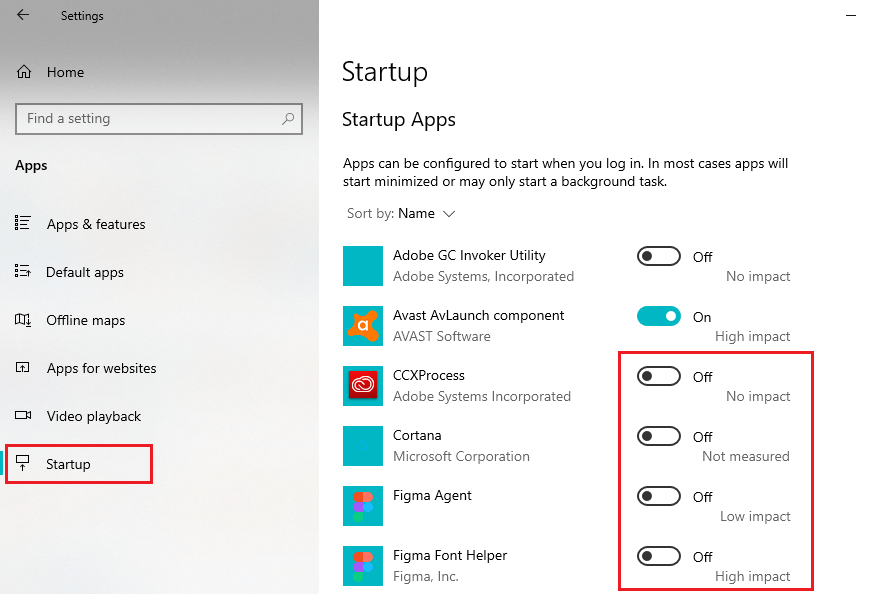
- Move to Apps and choose Startup from the left-hand menu.
- You will see a list of applications that are launched on startup. Move the toggle to turn off everything that you don’t need.
We recommend that you keep programs like an antivirus running or destroy hard drive data properly for security reasons. Other applications like messengers can usually be disabled without any harm to your computer. However, if you are using essential marketing tools for small business regularly, it’s better to keep them running for uninterrupted work.
For example, Skype tends to load the system, and that’s why Windows 10 can start slow. By the way, if you’re having issues with this messenger, make sure you read our article on why Skype is running slow and how to fix it – there are many great tips that you can use.
We also advise you to use reputable VPN extensions and run a VPN test to make sure that it works properly and protects your data.
Update Graphics Drivers
Having outdated drivers can cause system errors and affect your PC functioning. If the issue is associated with your graphics card, you may even witness Windows 10 slow boot coupled with a black screen. Old graphic drivers can also affect gaming experience, that you see your computer freezes when playing games.
Before you go looking for hardware issues, it’s worth checking whether your graphics card drivers are outdated.
Here’s what you should do:
- Right-click on the Start button and select Device Manager.
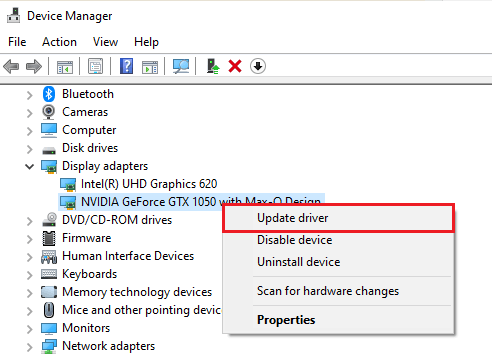
- Next, unfold the Display adapters line – you will see the type of graphics card installed on your PC.
- Right-click on the line and choose Update driver from the drop-down menu.
Select the option that suits you best. For example, you can choose to search for updated drivers automatically. Follow the on-screen instructions to finish the process.
Alternatively, you can simply download graphics from your manufacturer’s official website. For instance:
There’s also an easier way to have all the drivers on your computer updated – just run the Outbyte Driver Updater tool. This all-in-one solution will save you a lot of time since there would be no need to check for each update separately.
In some cases, old driver versions may negatively affect the overall functioning speed of your PC. We’ve collected some recommendations on how to remove old drivers on Windows 10.
Perform a Reset
There are several recovery options in the operating system that can help reset the settings. This may become a suitable solution for how to speed up Windows 10 boot in your case. Make sure you have the system product key written down somewhere – you may need it later. Here’s how you perform a reset while keeping all your files:
- Right-click on the Start button and select Settings.
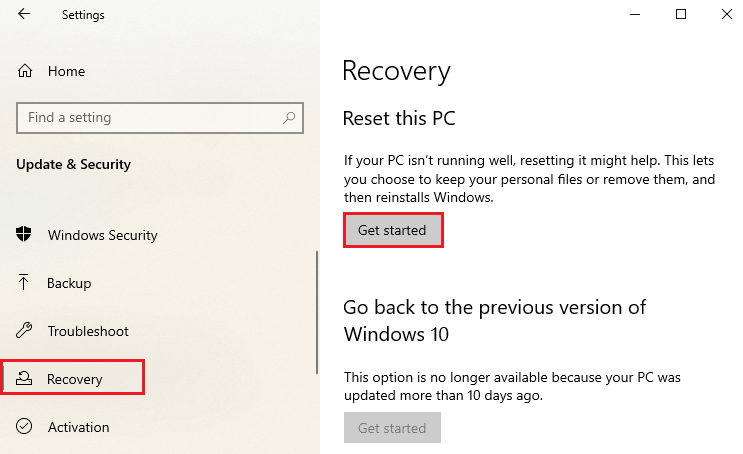
- Navigate to the Update & Security tab and select Recovery from the left-hand side menu.
- Click the Get started button under the Reset this PC section.
Choose the first option that allows you to save your files. Under Change settings, select either On or Off for Preinstalled apps. In the latter case, the reset will remove all the apps – even those installed by your PC manufacturer.
Check the Hardware to Speed Up Windows 10 Boot
Sometimes, it’s what under your PC case that causes Windows to load forever. For example, you should regularly monitor the CPU temperature as constant overheating may significantly damage your machine up to the point it will stop working. We have a great article uncovering what is considered a good and safe CPU temperature.
If you notice CPU spikes in the Task Manager and the temperature is above the average, you can also check the chipset performance. You should probably update chipset’s drivers or buy a new unit.