You may sometimes open the Task Manager only to see a high CPU caused by Windows Explorer.
It may happen for many different reasons. Read this article to discover how to fix the Windows Explorer high CPU problem.
Checking whether the system functions normally helps to identify the issue with Windows Explorer using high CPU. One way to do it is to run the PC Repair tool by Outbyte. It will scan your system, detect corrupted files and delete them, improving the overall performance of your PC system.
Windows Explorer High CPU Reasons
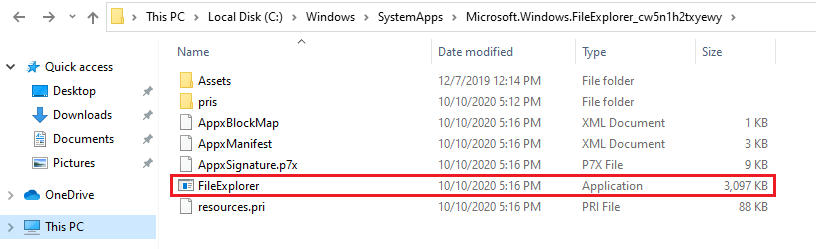
Windows Explorer is a system file of the Microsoft Windows operating system. This core application takes up about 2 MB volume. Moreover, you can find it in this directory:
C:\Windows\SystemApps
Normally, when you run it to look for files on your computer, it doesn’t result in high CPU. However, some users experience the Windows Explorer high memory issue. Some of the reasons for that may include:
- Too many processes running on the background
- System errors
- Issues with Windows updates
- Third-party applications
- User profile corruption
- Viruses and malware
Any of these factors can cause Windows Explorer to consume high CPU resources and lead to more performance issues. The same is true for other processes on your computer, including lockapp.exe and windows shell experience host. Knowing the reason behind the high CPU usage can help you quickly resolve the problem.
Steps to Fix the Windows Explorer High CPU Issue
Step 1: Check All Running Applications
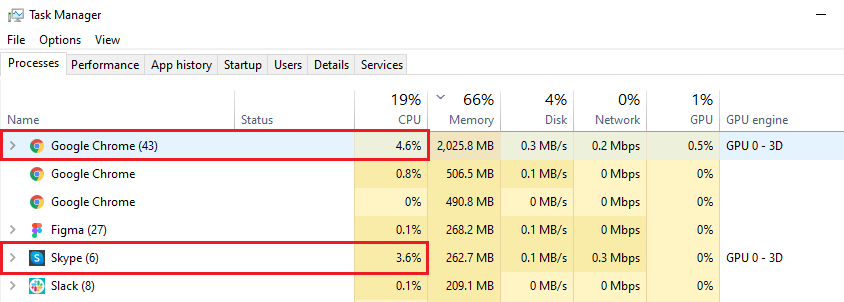
Sometimes, it’s not only Windows Explorer that causes high CPU. Firstly, you need to check whether other applications are creating the problem.
- Press Ctrl + Shift + Esc on your keyboard or right-click on the Menu button and open the Task Manager.
- Go to the Details tab to see all programs running on your computer.
- Close any applications using high CPU that you don’t currently need running.
Read also: Fix high CPU usage of Microsoft.photos.exe
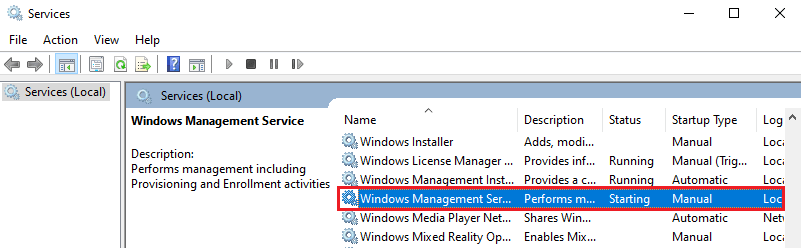
Step 2: Restart the Windows Management Instrumentation Service
Sometimes the CPU usage can be improved by restarting the Windows Management Instrumentation service. Do the following:
- Right-click on the Menu button and choose Run.
- Enter
services.mscand hit OK. - Locate the Windows Management Instrumentation line, right-click on it and choose the Restart option.
Step 3: Create a New User on Your PC
Sometimes it’s reasonable to create a new user profile to see if the Windows Explorer high CPU remains on it.
- Right-click on the Menu button and choose Settings.
- Press Accounts and choose Family & other users from the menu on the left.


- Press Add someone else to this PC. Assign a username with a password and a password hint and press Next.


- Proceed again to Menu > Settings > Account > Family & other users.
- Go to the Change account type option and change the Account type to Administrator. Press OK.
- Restart your PC and log in to the new administrator account.
- Run Windows Explorer and check in the Task Manager how much CPU it uses.
Step 4: Scan for Viruses
Viruses and malware may be the reason for Windows Explorer high memory usage. You may use your antivirus software to do that. Just follow the instructions that come up while you run the program and take note of any protection options.
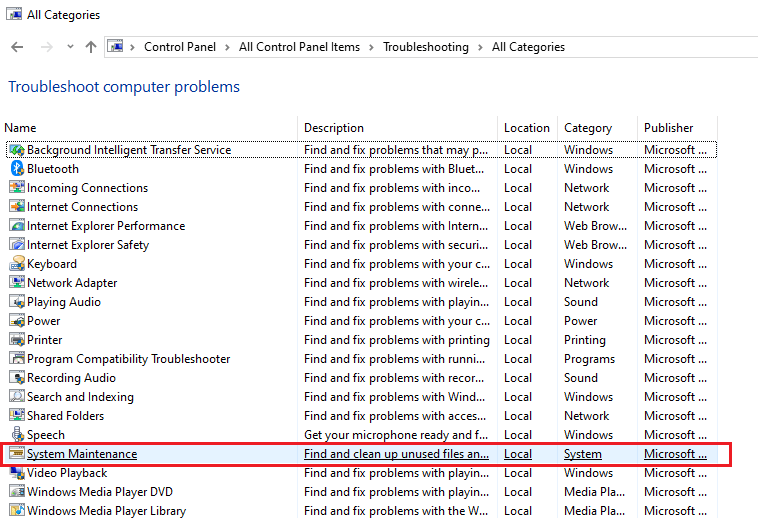
Step 5: Run the System Maintenance Troubleshooter
To see if any system issues are causing the Windows Explorer high CPU usage, you can run Windows Troubleshooter.
- Right-click the Menu button and press Run.
- Type
controland click OK to open Control Panel. - Click Troubleshooting and choose View all options on the left side menu.
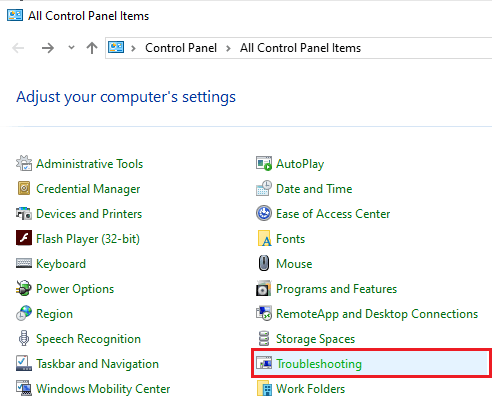

- Choose System maintenance from the list, click Next in the appearing box and follow the on-screen instructions.

Step 6: Run the SFC Scan to Fix Windows Explorer Corrupted Files
Running the system file check may help fix corrupted files that cause Windows Explorer using high CPU.
- Right-click the Menu button and choose Windows PowerShell (Administrator) or type
CMDand run the as Administrator (depending on your Windows system release). - Type
sfc /scannowand hit Enter on your keyboard.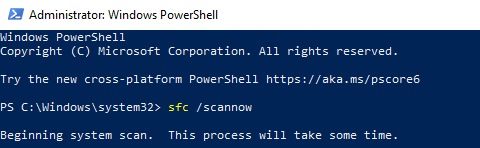

- Take note of messages appearing as scan results. In a good scenario, there will be no corrupted files or the system was able to fix them.
Using the SFC tool is one of the most effective ways to deal with a wide range of Windows errors caused by system corruption. You can use it when you’re getting an application error, such as 0xc0000142. Whatever the error is, deleting corrupted system files using SFC should be part of your troubleshooting process.
Step 7: Run DISM to Fix CPU Issue
Whether the SFC scan has found errors that couldn’t be fixed, you can try running Deployment Image Servicing and Management (DISM) to solve this. Go through checking, scanning, and restoring system health by doing the following:
- Right-click the Menu button and choose Windows PowerShell (Administrator). Alternatively, you can press Windows Key and type
CMD. Right-click Command Prompt from the results and select Run as Administrator. - Type
DISM /Online / Cleanup-Image / CheckHealthand hit Enter on your keyboard.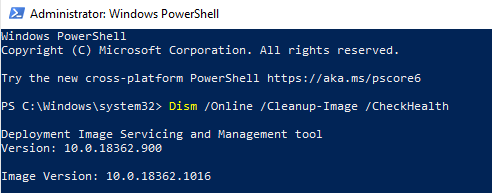

- After the process is over, type
DISM /Online / Cleanup-Image / ScanHealthand hit Enter. - Finally, type
DISM /Online / Cleanup-Image / RestoreHealthand hit Enter.
The process takes time. So, make sure you have enough of it before you run DISM. You can refer to Step 6 after and perform the SFC scan again and see if that solves the Windows Explorer high CPU issue.
Step 8: Perform Disc Clean-Up and Defragmentation
Disc clean-up and disc defragmentation are two separate processes. You can choose to run both or either of them to fix system errors associated with corrupted files.
To perform disc clean-up:
- Open Windows Explorer and go to This PC.
- Locate the C drive, right-click on it, and choose Properties.
- In the General tab click the Disc cleanup button.
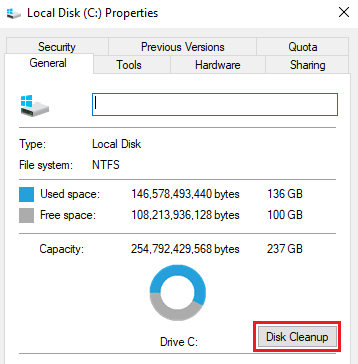

- Locate the Clean up system files button and click on it.
- Check every option on the list except for the Downloaded program files option.
- Click OK.
To perform disc defragmentation:
- Open Windows Explorer and go to This PC.
- Locate the C drive, right-click on it, and choose Properties.
- In the Tools tab click the Optimize button.
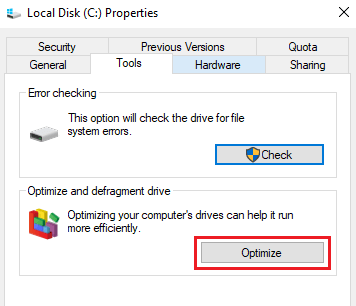

- Locate and choose the C drive and press Optimize.
Note: disc clean-up and defragmentation can only be run with administrator’s access.
If you’re wondering why is File Explorer so slow, then Windows Explorer high CPU usage might be the reason. This can happen when Windows Explorer is working in a strained environment, preventing it from functioning properly.