Error code 0x80246007 is yet another issue that PC users may encounter when trying to update Windows. There are multiple reasons for why this happens.
Depending on which one causes the issue, you should use an appropriate method to fix it. Luckily, most of the solution steps are quite easy to follow. Read further to discover how you can fix Windows Update error 0x80246007.
Why Do You Receive the Error Code 0x80246007 Message?
Windows Update is an essential part of the Microsoft Windows operating system. When you can’t install updates, gradually your computer stops working properly. Many PC users discuss seeing error code 0x80246007 and not understanding how to solve it. It appears that there are two main reasons for this issue to occur:
- There are problems with the Windows Update database
- Some components are disrupted by certain Windows processes
Sometimes, you will get a notification that some updates didn’t finish downloading. Another variation of this error is the Windows Update error 0x80070002. When any of these errors occur, the Windows Update process fails to proceed with the installation and you’re stuck with an outdated operating system.
Fixing Error Code 0x80246007
Below is a step-by-step guide – follow it precisely to fix error code 0x80246007.
Method 1: Run Windows Troubleshooter
This is probably the easiest way to fix error code 0x80246007. Just let the built-in Windows troubleshooter tool do the work. Here’s how to run it:
- Press Win + S to open Search, type
troubleshootand select Troubleshoot from the options. - In the menu list, select Windows Update and click on the “Run the troubleshooter” button.

Wait for the process to finish. If it was successful, you should see the list of detected problems and the Fixed status for each of them. If that’s not the case, proceed to the following method.
Read also: How to fix error 0x80004003
Method 2: Perform a Clean Boot
That’s a suitable option in case the reason for error code 0x80246007 are third-party programs preventing Windows updates from installing. Here’s how you do it:
- Press Win + R to open the Run dialog.
- Type
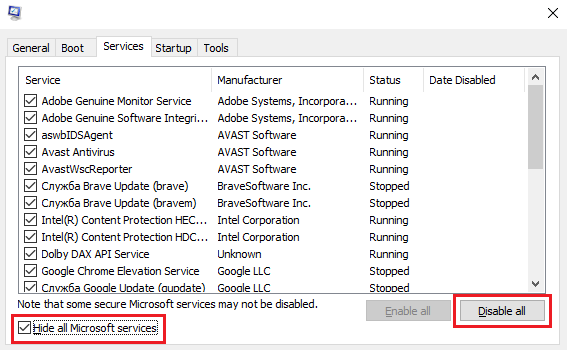
msconfig, press Enter to open Services Configuration, and move to the Services tab. - Locate and select Hide All Microsoft Services. Now click Disable All.

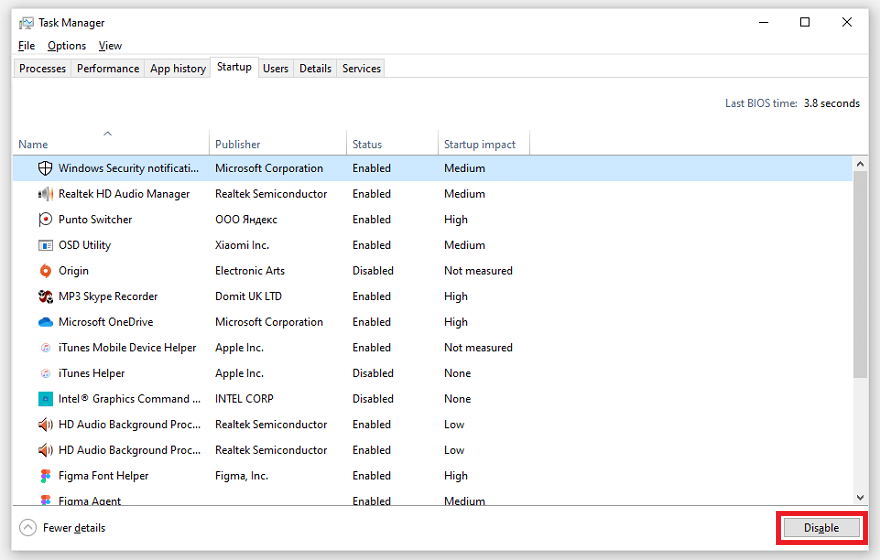
- Press Ctrl + Shift + Esc on your keyboard to open Task Manager and move to the Startup tab.
- Right-click each application on the list and select Disable from the drop-down menu.

- Return to Services Configuration, apply changes, and restart your computer.
When your PC loads again, there will be no third-party application running. If they were the reason why you kept receiving the error code 0x80246007 message, then you should be able to install Windows updates without issues.
P.S. There are also times when error 0x80246007 occurs together with error 0x80070422. If this happens, you can also try the troubleshooting steps for error 0x80070422 if the solutions don’t work
Method 3: Automatically Run BITS Service
- Press Win + R to open the Run dialog.
- Type
services.mscand hit Enter to open Services. - Locate and right-click on Background Intelligent Transfer Service (BITS) on the list to open its properties.
- Under the General tab, open the Startup Type menu and choose Automatic (Delayed Start).
- In the same tab, move to the Service status section, press the Start button, and click Apply.
Method 4: Create and Run a Repair.bat File
- Open Notepad or right-click on your desktop and choose to create a text document.
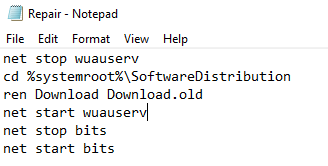
- Paste either of the following:
net stop wuauserv
cd %systemroot%\SoftwareDistribution
ren Download Download.old
net start wuauserv
net stop bits
net start bits
ORnet stop wuauserv
cd %systemroot%\SoftwareDistribution
ren Download Download.old
net start wuauserv
net stop bits
net start bits
net stop cryptsvc
cd %systemroot%\system32
ren catroot2 catroot2old
net start cryptsvc
- On the top menu, go to File > Save As
- Call your file Repair.bat and choose All Files (.) as its type.
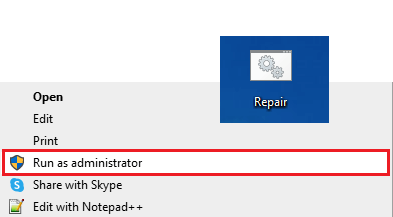
- Now locate your file, right-click on it and select the Run as Administrator option from the drop-down menu.

Now you should try installing the updates. If the process was successful and there was no error code 0x80246007, delete the .bat file you’ve created.
Method 5: Check Windows Defender Firewall
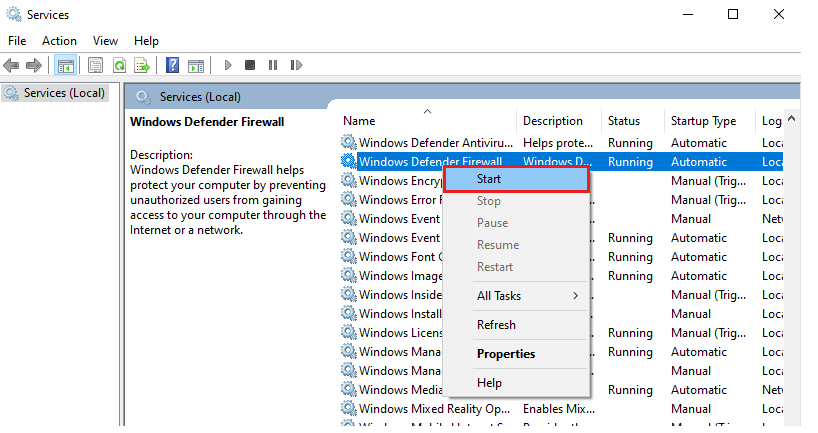
Windows Update needs a firewall to be enabled, so it’s worth checking whether it’s running. If not, you should start it. Check these instructions:
- Press Win + S to open Search and type
services. - On the list of services, locate Windows Defender Firewall. Check the column on the side of it to see if it’s running.
- If not, right-click on the process and choose Start.

Now you can try installing updates once again and see if error code 0x80246007 remains.
Method 6: Change User Account Control Settings
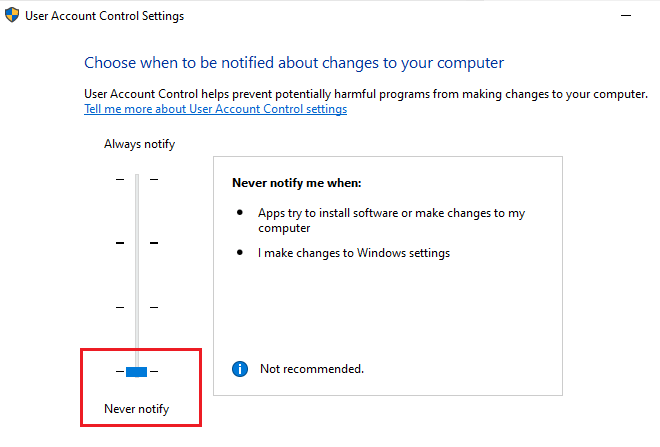
Finally, you can deal with Windows Update error 0x80246007 by disabling the User Account Control feature. This may work when you have several user accounts on your PC.
- Press Win + S to open Search and type
user account control. Press Enter. - You will see a window for setting the notification options. On the left-hand side, drop the slider to the lowest point to set the “Never notify” option. Click OK.

Now you can try installing Windows updates again.

