Have you ever experienced the Windows Update error 0x80070424 on your PC? It often happens as you try to update your computer system. If you have attempted to fix it and you are still searching for a solution, read this guide – it offers steps on how to solve the problem.
Why Does the Windows Update Error 0x80070424 Appear?
The error code 0x80070424 shows up when you are trying to update your PC. Windows Update is an essential part of the Microsoft Windows operating system. Through it, updates are downloaded and installed on the computer. The process requires certain services to run in the background.
A quick review shows that the 0x80070424 Windows 10 error message is a frequent occurrence among Windows PCs. Numerous discussions boil down to a couple of reasons for why it happens:
- Certain system processes required for updating are not running.
- Update files are not registered in the system.
While these are the most common problems, there may be several others as well. Below is a step-by-step guide on how to fix each of them.
The Windows Update Error 0x80070424: Solution Steps
Before you proceed, please take note that fixing errors like this requires you to make some changes to your PC system.
If you are not sure that you can do everything correctly, it makes sense to use a specially designed program. Run the PC Repair tool by Outbyte – it will scan your system files, detect the ones that are corrupted, and delete them. It will also improve the overall performance of your computer by making it run faster.
Step 1: Register Important DLL Files
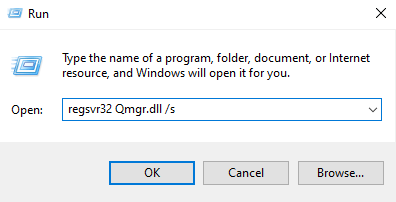
One of the features required for the smooth Windows update process is the correct functioning of the Background Intelligent Transfer Service (BITS). If some of its files are not registered, this may cause issues like the error code 0x80070424. To register the DLL files of BITS, do the following:
- Right-click on the Menu button or press Win + X on your keyboard and select Run.
- Type
regsvr32 Qmgr.dll /sand hit Enter. - When the task is complete, return to the Run tab and type
regsvr32 Qmgrprxy.dll /s. Press Enter
Make sure you place the spaces correctly – just copy the lines from here to make sure you enter commands properly. After you are done registering these DLL files, restart your PC and try running Windows Update once more.
Step 2: Check Certain Services
You may receive the error code 0x80070424 when important processes, like BITS, on your computer are stopped. To fix this, do the following:
- Right-click on the Menu button or press Win + X on your keyboard and select Run.
- Type
services.mscand hit Enter – it should take you to the Services module. - On the Services(Local) list, locate the Background Intelligent Transfer Service line and right-click on it.
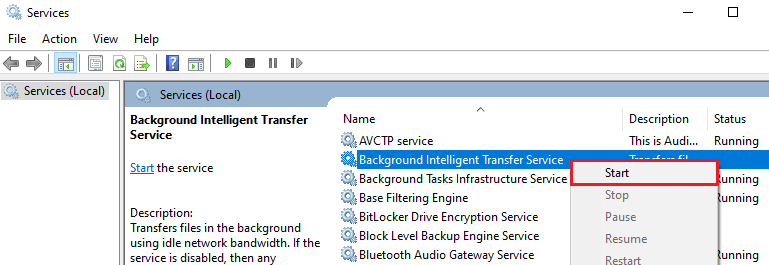
- Check the service’s status: if it is stopped, click the Start option from the menu list.
- On the same Services list, locate the Windows Update line. Right-click on it as well and change the status to Start.
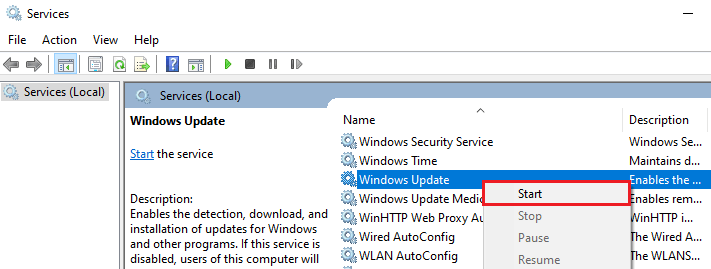
- Finally, locate the Workstation service on the list and start it using the same approach.
Now that you have all the necessary processes running, you may restart your PC and check if the Windows Update error 0x80070424 remains.
Step 3: Tweak the Windows Registry
Sometimes restrictions associated with Windows Update are imposed by the Windows Registry. Check if that’s the issue and change the corresponding settings to fix it:
- Right-click on the Menu button or press Win + X and select Run.
- Type
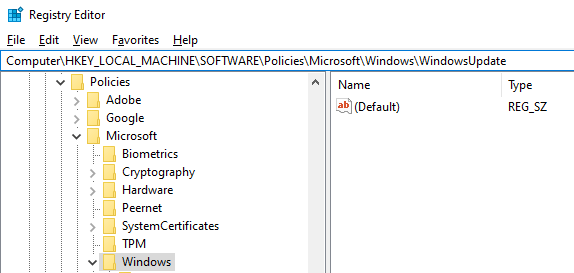
regeditand hit Enter on your keyboard to open the Registry Editor. - By following the path
HKEY_LOCAL_MACHINE\SOFTWARE\Policies\Microsoft\Windows\WindowsUpdatelocate the list of registry files. - Find the DisableWindowsUpdateAccess DWORD. Double-click on it to edit its value.
- In the Value data line, enter 0 and click OK. You should restart your computer to make the changes work.
Step 4: Run the Windows Update Troubleshooter
Occasionally, built-in Windows tools help to fix issues like the error code 0x80070424. Run the Windows Update Troubleshooter and see if it solves the problem:
- Press Win + I on your keyboard to open the Settings menu.
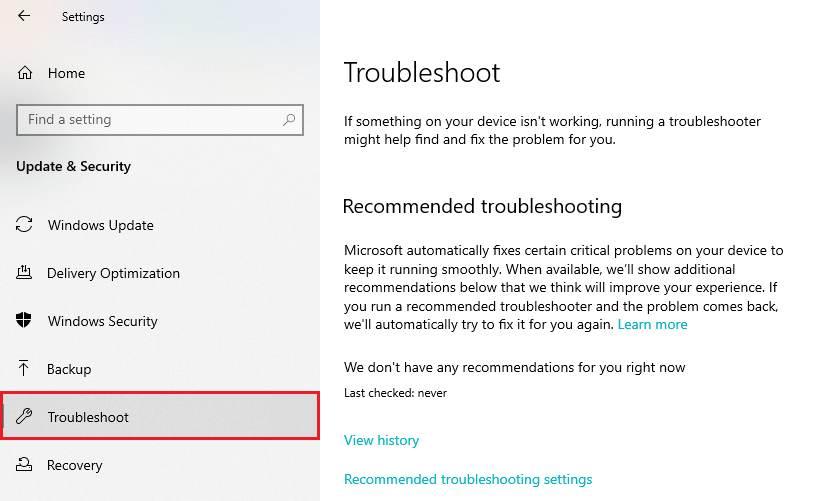
- Move to the Update&Security tab.
- On the left-hand menu, locate and click the Troubleshoot tab and click Additional Troubleshooters.
- Under the Get up and running section, press Windows Update and select the Run Troubleshooter option.
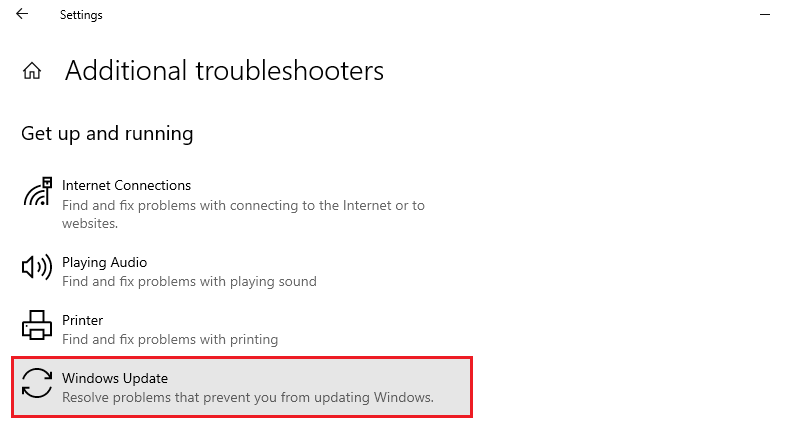
- It will take some time for the process to finish. See the report to check whether the issue has been resolved.
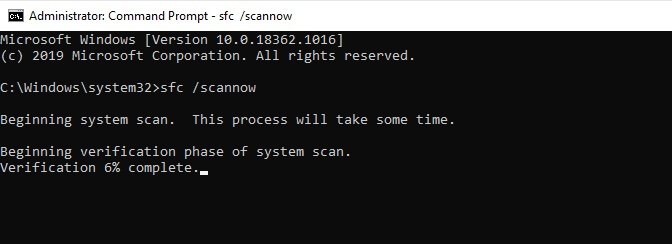
Step 5: Run SFC
If none of the steps have worked for you, the problem may be rooted in system file errors. Try running the System File Checker (SFC) to see if it can repair your system files and solve the Windows 10 0x80070424 error:
- Right-click the Menu button or press Win + X and select Run.
- Type
cmdand press OK to open the Command Prompt. You should run it as an administrator. - Type
sfc /scannowand hit Enter. Make sure you place the spaces correctly. - Wait for the scan process to finish and take note of any information it provides.
In a good scenario, the SFC scan will detect and remove corrupted files that create errors in your system. If there are any issues that could not be solved, it may be a sign that you need to make serious changes to your PC.