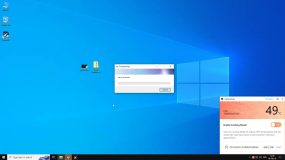
Windows 10/11 has been widely used since its release, but like any software, it has its issues. Windows 10/11 error 0xc0000017, along with the message ‘The Application Was Unable to Start Correctly’, is pretty irritating. This occurs mainly because of some lousy entries within the memory or incompatible applications. If you see this error while opening Task Manager or Registry Editor, this guide on Outbyte will help you understand and fix the problem.
What Causes the Application Error 0xc0000017?
This error can appear for several reasons, such as:
- Incompatible software or applications running on your system architecture: Running a 32-bit application on a 64-bit system can cause this issue.
- Bad memory entries stored on your system.
- Insufficient virtual or physical memory: Applications need a certain amount of RAM and virtual memory to run. If your system doesn’t have enough, the error may appear.
- Faulty Windows updates that disrupt the system.
- Missing or corrupted system files.

How to Fix the Application Was Unable to Start Correctly (0xc0000017)
Many guides ask you to do unnecessary things, but in truth, there are only a few solutions for this. Before you do anything, we suggest creating a restore point first. This way, you can easily restore your files and settings in case anything goes wrong.
Solution 1: Clear Bad Memory Entries
Sometimes, this error is fixed by clearing the bad memory entries from your system. Here’s how you can do that:
- Open Command Prompt as an administrator.
- Type the command
bcdedit /enum alland press Enter to display bad memory entries. - Then, clear them with the command
bcdedit /deletevalue {badmemory} badmemorylist. - Restart your computer and see now whether the issue persists.
Solution 2: Repair Windows with Bootable Media
If the above solution does not work, then you can repair your system using bootable media. You need to download the ISO file of the operating system from Microsoft’s official website and make a bootable USB/DVD using the installation media. With this media, you will be able to start up the computer and start the Startup Repair by selecting Repair your computer > Advanced Troubleshooting options.
Solution 3: Run the Program as Administrator
Sometimes, the application doesn’t have enough permission to run properly. Right-click on the icon of the application and select Run as Administrator. Confirm any queries coming from User Account Control by clicking Yes. Now, you can try running the application without errors.
Solution 4: Reinstall the Affected Application
Sometimes, this issue can be fixed with the simple reinstallation of the problematic application. So,
- Open up Settings > Apps and search for the application which developed the fault and uninstall it.
- Now go to the official website download the very latest version and install it.
- While reinstalling the antivirus should be disabled temporarily. The third-party program also needs to be checked as it is piggybacked on the additional software program. In this way, you can make sure that no extra program gets installed along with the application.
Solution 5: Update the .NET Framework
Another cause can be an outdated or missing .NET Framework that could cause this error. Here is how you update/install it:
- Open Control Panel > Programs and Features.
- Click on Turn Windows features on or off.
- Put a checkmark in the box beside .NET Framework 3.5 and then click OK to install.
Solution 6: Run the CHKDSK Command
Verify that your hard drive is free from any issues using the CHKDSK command via following these steps:
- Open the Command Prompt application as an administrator.
- In the command prompt text area, enter
chkdsk /f /rand then press Enter. - Then, reboot your computer to finish the scan and repair process. Solution
Solution 7: Update Windows
In some cases, updating Windows to the latest version resolves this issue:
- Go to Settings > Update & Security > Windows Update.
- Click Check for Updates and install any pending updates.
Solution 8: Update an outdated xinput1_3.dll file
Although this is somewhat of a technical solution since it involves replacing the xinput1_3.dll file, a lot of affected users reported that this solution resolved the issue. Therefore, using it will be worth a try. You will need to download the xinput1_3.dll file from Google, extract the files, copy this file from the newly extracted folder, and then paste it into the SysWOW64 folder. Click the Copy and Replace button when asked for confirmation to replace the existing file.
Solution 9: Replace the physical RAM
If none of the above solutions can solve the problem, it’s time to replace the actual RAM module with a new one. Now, if your computer is still under warranty, take it to the manufacturer and have the RAM replaced. Else, you need to get yourself a new RAM that is compatible with your motherboard.
People Also Ask
Read about common Windows Errors:
How to Fix the 0x800F0831 Error Code on Windows 10/11?
FAQs
1. What is error 0xc0000017?
This most often means there is a problem with bad memory entries, missing system files, or an inadequate allocation of memory in Windows.
2. Will the error get fixed without reinstalling Windows?
Yes, other than running bad memory clear, CHKDSK, and an update of the .NET Framework, there are several other methods that will allow you not to reinstall Windows.
3. Will updating Windows fix the error?
Do a Windows update to ensure that the reason for this error is not some faulty Windows update or incompatibility of a system. Once updated, Windows itself should automatically be able to resolve this afterwards.
4. How do I clean bad memory entries?
You can clear bad memory entries by using the bcdedit command in Command Prompt as described above.


