Kernel Mode Heap Corruption is one of the frustrating BSOD issues for Windows 10 and Windows 11 users, ruining your workflow. These kinds of errors generally indicate some sort of problem with the system drivers, hardware issues, or software conflicts. It is, therefore, very important to find out what exactly causes this error and remove it to regain system stability. Now, let’s see what this error is all about, why these kinds of errors occur, and how they can be effectively repaired.
What Is the Windows 10/11 Blue Screen Kernel Mode Heap Corruption?
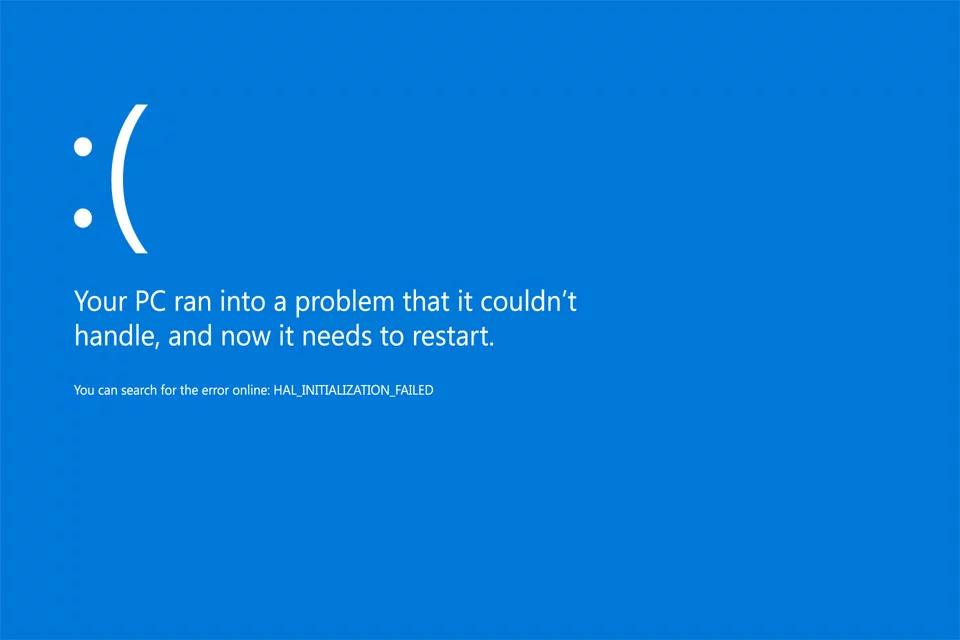
Kernel Mode Heap Corruption is a BSOD in which some operation goes out of its bounds inside Windows’ kernel mode, responsible for the handling of hardware and process manipulation. It occurs when any process corrupts that part of used memory, called heap utilized by the kernel. If such corruption happens, it will just shut down the system to not allow further damage due to which a BSOD occurs.
This can happen at random times or during event viewings such as gaming, video rendering, or even extreme multitasking. Thus, leading to system crashes and reboots.
What Causes Kernel Mode Heap Corruption Blue Screen in Windows 10/11?
The causes for kernel heap corruption are:
- Incompatible or Corrupted Drivers: The GPU drivers or any system drivers corrupted or outdated.
- Hardware Issues: RAM, a failing GPU, and other components cause memory corruption.
- Overclocking: Most systems could not keep running the components at higher clock frequencies than recommended.
- Software conflict: When different programs and malware conflict with one another, thereby causing a crash of the processes running in a system.
- Windows Updates: Sometimes, updates can cause such incompatibility issues to exhibit themselves through this error.
Knowing these causes identifies and narrows the specific issue that may be affecting your system.
Read about other common Windows Errors:
DRIVER_POWER_STATE_FAILURE BSOD error
PAGE_FAULT_IN_NONPAGED_AREA Error
How to Fix Kernel Mode Heap Corruption BSOD on Windows 10/11
Start by identifying the likely cause of the error and applying the following solutions:
Method 1: Boot Windows 10/11 into Safe Mode
If you’re unable to access Windows due to the blue screen error, you’ll need to boot into Safe Mode. This mode runs only essential programs and services, preventing conflicts caused by third-party apps.
To enter Safe Mode:
- Hold the Power button for 5 seconds to turn off your computer.
- Repeat this process 2-3 times until the Preparing Automatic Repair screen appears.
- Let the system find the problem and click Advanced options.
- Go to Troubleshoot > Advanced options > Startup Settings and click Restart.
- After your computer restarts, Press F5 for Safe Mode with Networking.
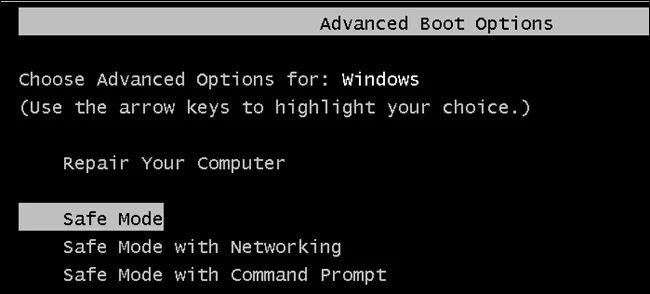
Activate the Safe Mode with Networking since it opens up access to the internet that will come in handy during further troubleshooting or downloading fixes.
Method 2: Roll Back Your Graphics Card Drivers
Well, this is easily done in case it is a recently updated graphics driver-that is, it will roll back to its previous version. Here’s how:
- Press Windows + R to open Run, type in
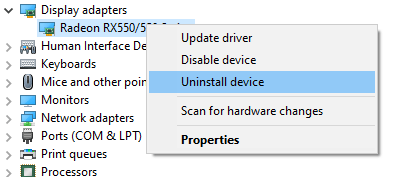
devmgmt.mscand press OK. Now, in Device Manager, double-click on Display adapters to expand the list. - Right-click your graphics card, then select Properties. Now, go into the Driver Tab, then click Roll Back Driver.
- If the option is grayed out: In that case, that would mean no previous driver available for roll back. Otherwise, follow other methods.
- Choose a reason for rollback then click Yes.
- Restart your computer to take effect changes.
After the driver roll back, check that the Kernel Mode Heap Corruption error was resolved or not. If it does, proceed with other below troubleshooting method.
Method 3: Update or Reinstall Drivers
Often, this is due to corrupted or outdated GPU drivers. Run through Device Manager to check for updates or reinstall the drivers. Certain tools like Outbyte Driver Updater make sure drivers are updated and compatible with Windows 11.
In our Driver library you can find the most suitable GPU drivers for your OS and a short guide on how to install it.
Read also about other popular Graphic cards Drivers:
Method 4: Check Graphics Card for Problems
Since display drivers are one of the main causes of this error, checking if there is any problem with your graphics card is essential. Go through the following steps to discover and fix possible problems:
- Press Win + R hotkeys to open Run dialog.
- Type
devmgmt.mscand press Enter or click OK. - Click on Device Manager and expand it to Display Adapters to see your graphic card.
- Right-click on the video card, updating the driver.
- Then, Windows will automatically search for any available update and download and install it.
In case no updates were found, or there is some error at any point in time, go to your manufacturer’s website and manually download the latest driver for the graphics card.
After updating the driver, please restart your computer and check if the error is gone.
Method 5: Use Driver Verifier Manager
Driver Verifier Manager is a utility tool that could be employed in finding those problematic drivers causing this Kernel Mode Heap Corruption error in Windows 10/11. Here’s how:
- Run Admin Windows PowerShell.
- Type
verifierand press Enter to start the Driver Verifier Manager. - In the Verifier window, select Create Standard Settings and click Next.
- Choose Automatically select all drivers installed on this computer and click Finish.
- Restart your PC when prompted to allow the tool to scan for corrupted or outdated drivers.
After the reboot, Windows will list any drivers with errors. Update, roll back, or reinstall these drivers to resolve the issue.
Method 6: Use the Windows BSOD Troubleshooter (For Windows versions earlier than 1809)
The Blue Screen Troubleshooter diagnoses and fixes hardware, drivers, memory and a lot of other problems. You won’t have access to it if you’re running Windows 10 version 1809 or later but if you’re using an earlier version you can fire up the tool:
- Open Control Panel > Troubleshooting
- Click View all in the left-hand menu
- Right-click Blue Screen > Run as administrator
- Click Advanced > check the box for Apply repairs automatically > Next.
It now opens the troubleshooter to find any issues related to the blue screen. If it finds any, proceed by following the on-screen commands to resolve them.
See Microsoft’s support page entitled “Troubleshoot blue screen errors,” for newer versions of Windows.
Method 7: Use Windows Memory Diagnostic Tool
The Windows Memory Diagnostic tool will check problems on your computer with RAM. To do this, follow these actions below:
- Press Windows + R and open the Run dialog.
- In the field, type in
mdsched.exeand press Enter. - Click Restart now and check for problems (recommended) to run the test straight away or Check for problems the next time I start my computer to schedule it.
- Save your work because the tool will restart your PC right away by choosing Immediate restart.
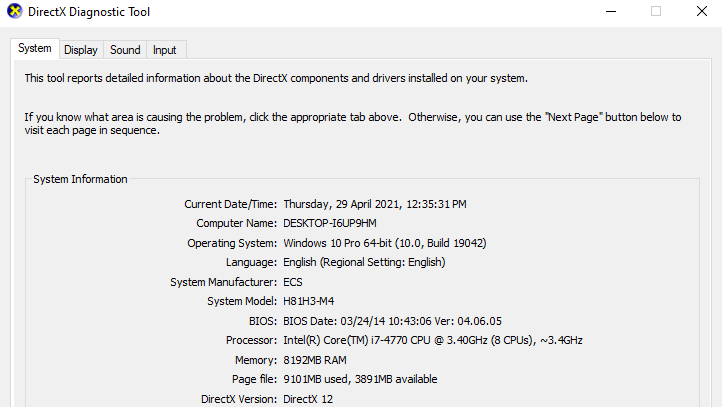
When the tool finishes running, you will see in the number of passes with the percentage completed. If, after all this process, it doesn’t show errors, then your RAM is OK otherwise you need to consider replacing the RAM or contact your hardware manufacturer for more support.
Method 8: Repair Corrupted System Files
Corrupted system files can cause the Kernel Mode Heap Corruption error. To repair these, use the following two tools:
1. System File Checker (SFC)
- Press Windows + R, type
cmd, and press Ctrl + Shift + Enter to open Command Prompt as administrator. - Type
sfc /scannowand press Enter. The SFC tool will then look for corrupted or missing system files and repair or replace them. Once it’s done, restart your computer to apply changes.
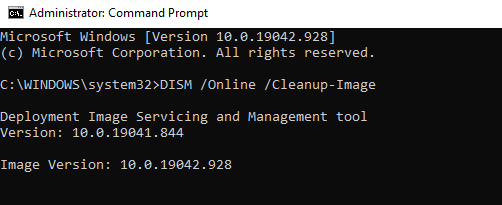
2. DISM Tool
If the above doesn’t work, then implement the DISM tool, which is short for Deployment Image Servicing and Management:
- Do the above to open the Command Prompt as an administrator.
- In the prompt that says, ‘Type’ the following command:
dism.exe /online /cleanup-image /restorehealth, press Enter. - It will then start searching for system problems that it knows it can identify and fixes them.
- Once that’s done, reboot the computer to find the error has vanished.
Method 9: Resolve Software Conflicts
Software conflicts can cause the Kernel Mode Heap Corruption error, especially after installing new apps or running certain programs like games. Resolving these conflicts involves identifying and managing problematic software.
Check for Software Conflicts
Close unnecessary programs and background processes to see if the error persists:
- Press Windows + X and select Task Manager.
- Under the Processes tab, select a program and click End Task to close it. Save your work first if needed.
- Avoid closing unfamiliar programs, as they may be critical system processes.
If the error continues, it’s likely not caused by software conflicts. If it stops, a recently closed program is likely the cause.
Identify Problematic Programs
To track the conflicting program:
- Restart each program one by one and wait to see if the error shows up again.
- If the error happens, this last program restarted is probably the cause.
Leave the suspected program open, if need be, and recreate the steps with other apps to see if there is a conflict.
Manage Conflicting Programs
By identifying the problem, you can
1.De-prioritising the Program
- Press the Windows + R, type in
taskmgr, and press Enter. - Open Task Manager, then Details, look for the program, right-click on it.
- Click Set Priority > Low.
- Avoid changing priorities for system-critical processes.
2. Disable the Program
- Open Task Manager and end the task for the program.
- Prevent it from starting with Windows:
- Press Windows + R, type
msconfig, and hit Enter. - In the Startup tab, click Open Task Manager, select the program, and click Disable.
3. Uninstall the Program
- Press Windows + R, type
appwiz.cpl, and press Enter. - In Programs and Features click the program and then click Uninstall.
After managing the conflicting program, restart your computer to see if the error is resolved. If the issue persists, consider trying additional fixes.
Method 10: Check for Hardware Issues, Including Overheating
Hardware issues, including overheating, can cause the Kernel Mode Heap Corruption error. Diagnosing these problems may require disassembling your computer to inspect components such as the CPU, RAM, or GPU. If you’re unfamiliar with hardware troubleshooting, it’s best to seek help from a local technician.
If no problem in the hardware was found, or if a problem existed but the error refused to go away you will have to reinstall Windows.
Method 11: Reset or Reinstall Windows
If other fixes haven’t worked, resetting or reinstalling Windows can resolve stubborn errors.
Resetting Windows
Resetting returns your PC to its default state, removing installed apps but allowing you to keep or delete personal files. Here’s how to reset:
- Open Settings and go to Update & Security > Recovery.
- Under Advanced Startup, click Restart Now.
- Select Troubleshoot > Reset this PC > Remove everything.
- If prompted, insert Windows installation media.
- Choose whether to remove files from all drives or just the Windows drive.
- Select Just remove my files for a quick reset or Fully clean the drive for a more secure erase.
- Click Reset to start the process. Once complete, follow the on-screen instructions to set up your computer.
Clean Installing Windows
A clean install erases everything on the system drive, requiring a USB or DVD installation media. Steps to perform a clean install:
- Create installation media using the Microsoft Media Creation Tool.
- Insert the media and restart your computer.
- Access the Boot Menu by pressing the appropriate key (e.g., F12 for Dell, F9 for HP).
- Select the installation media to boot from. Follow the installation prompts, selecting the Custom option when asked. Select the primary partition to install to and continue.
Once installed, activate Windows with your product key or run slmgr.vbs /ato through Command Prompt. Both Windows reset and reinstall will remove system errors; however, clean installs are deeper, particularly where the problems remain constant.
FAQs
What is a kernel mode heap corruption?
That is the condition when Windows has problems with the memory of the kernel mode, and some kind of process corrupted the heap that led to this crash.
Is kernel mode heap corruption a common problem on Windows 11?
Yes, this error can occur both in Windows 10 and 11 because of similar issues with drivers or hardware.
How do I fix kernel mode heap corruption on my PC?
Update the drivers, look for hardware issues, and deactivate overclocking. Scanning for malware and employing System File Checker should help.
Could this error be a result of outdated GPU driver?
Outdated/ Faulty GPU driver is the most generalized reason behind kernel mode heap corruption Windows 11 errors.
Is disabling Overclocking to fix this issue safe?
By disabling overclocking, your system will be stabilized, and this is advisable when overclocking has caused instability.


