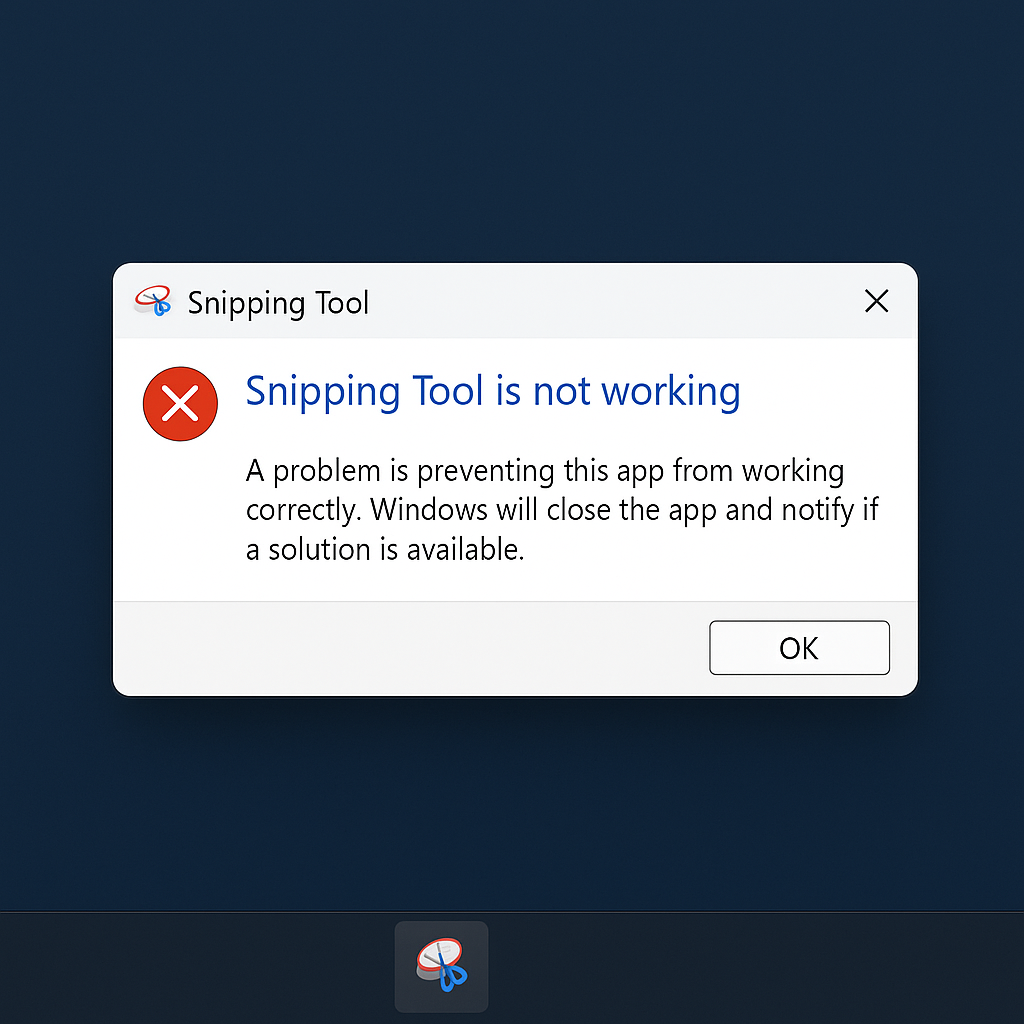
Snipping Tool Not Working
Snipping tool not working on Windows 11 is a common issue users face when trying to take screenshots or annotate them with ease. The Snipping Tool is quite a nifty utility for Windows 11 when it comes to screenshotting followed by annotating with minimum fuss. However, there have been complaints about opening the tool, saving screenshots taken via the tool, or freezing up altogether.
This might be a result of some bug in the version, corrupted files, or wrong settings. Let’s find out what the problems could be and how to fix these.
Work through these simple steps before advancing to more serious troubleshooting options:
Restart Your Computer
Sometimes, a simple restart can clear temporary glitches and get the Snipping Tool working again.
Update Your System
Make sure your system is updated: open Settings, go to Windows Update, click Check for updates. Apply all updates and reboot your computer. After this, try the Snipping Tool.
💡 Quick Tip: If you want to avoid issues caused by outdated or incompatible drivers, consider using Outbyte Driver Updater. It automatically checks your system for outdated drivers and installs the latest versions, which can help maintain stability for built-in apps like the Snipping Tool.
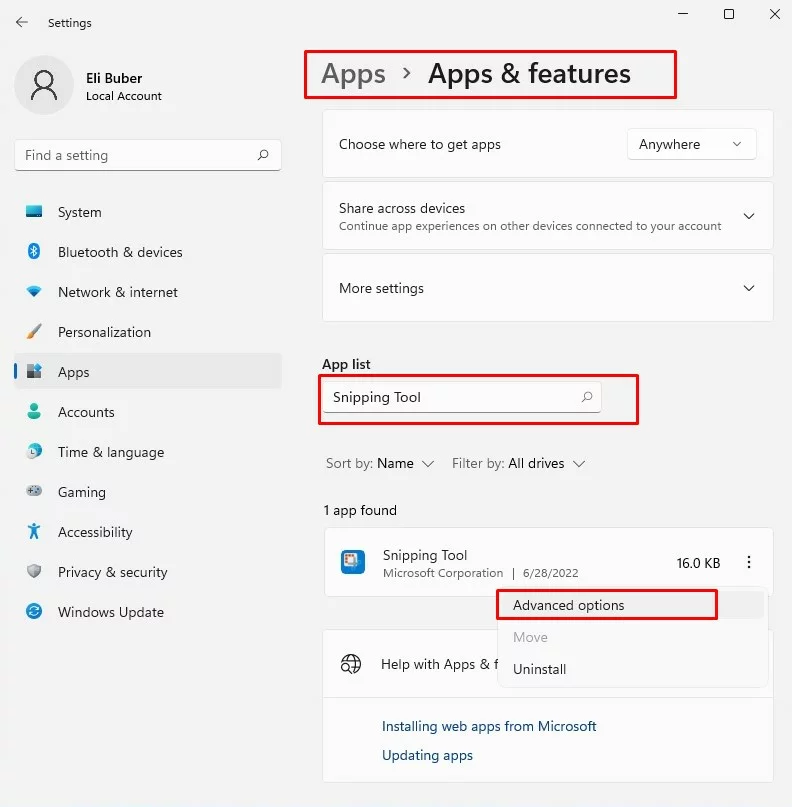
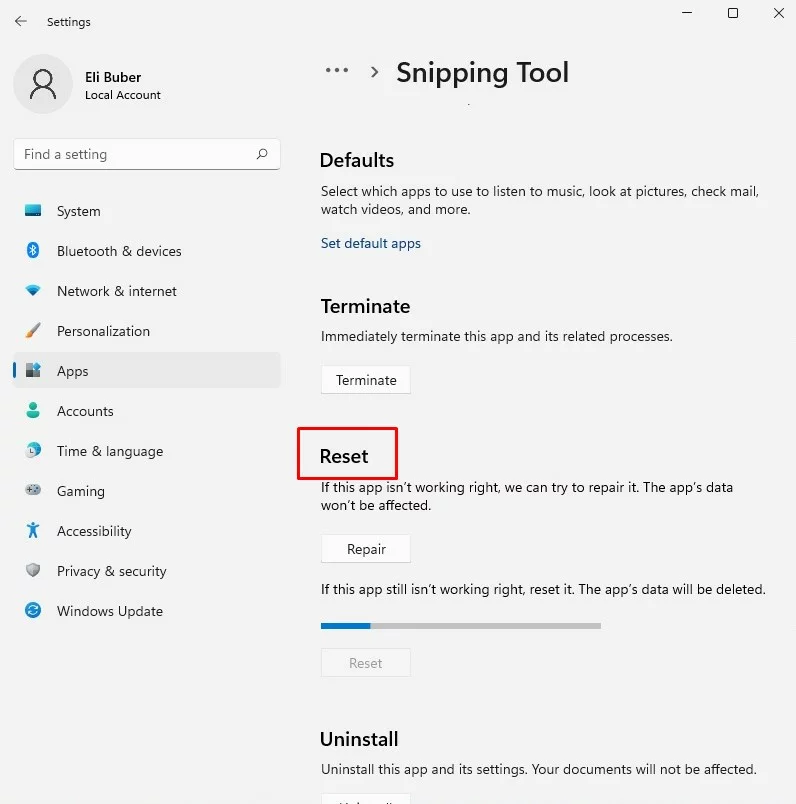
Repair or Reset the Snipping Tool
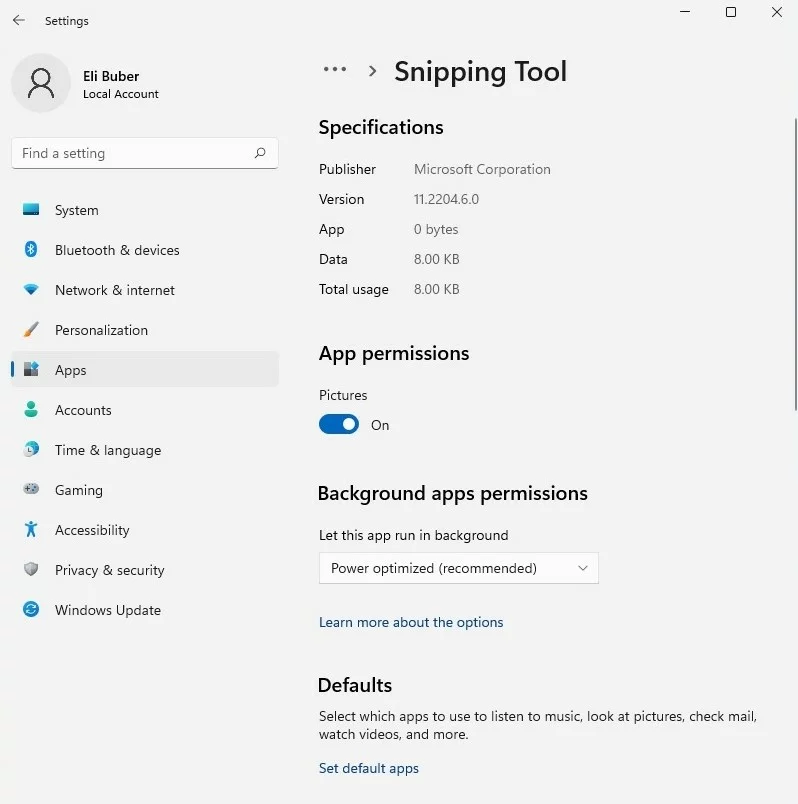
Open Settings > Apps. Scroll down and select the Snipping Tool, followed by Advanced Options. Now select either Repair for minor problems or Reset to take it back to its default state (this will delete your preferences).
Check Keyboard Shortcuts
Make sure the Snipping Tool shortcut has not been changed or overridden.
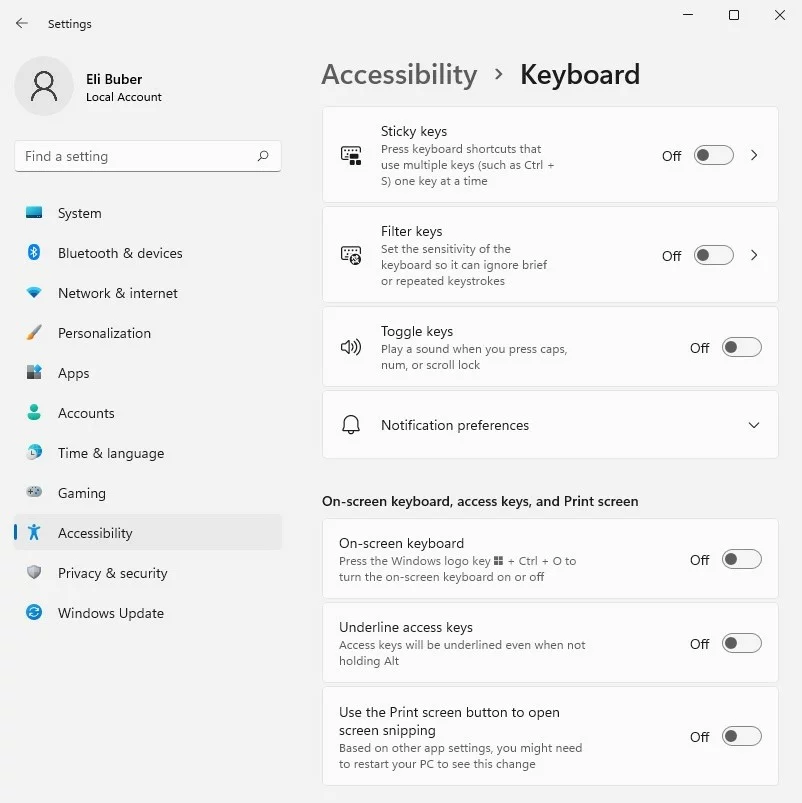
Click on Settings > Accessibility > Keyboard > Keyboard shortcuts and verify your system shortcuts.
Try Snip & Sketch
Windows 11 also includes the Snip & Sketch tool for capturing screenshots. Use it as an alternative to see if it meets your needs.
These steps may help resolve the issue, though they might not work for everyone. Continued user feedback plays an essential role in identifying and addressing such problems in future updates.
Snipping Tool Not Opening Automatically After Snip
If your Snipping Tool doesn’t open automatically after you capture a snip, it may be due to settings changes or software glitches. This can disrupt your workflow, especially if you rely on the Snipping Tool for quick edits. Adjusting the app’s settings or updating it can often fix the problem.
Snipping Tool No Longer Saving Screenshots
When the Snipping Tool stops saving screenshots, it’s usually because of storage issues, a misconfigured save location, or app-related bugs. Identifying the root cause and applying targeted solutions can help you regain full functionality.
Common Urgent Solutions
Use the Print Screen Key
If the Snipping Tool isn’t working, consider using the Print Screen key as an alternative.
- Press Windows + Print Screen to capture your screen.
- The image will be saved automatically in the Screenshots folder within Pictures.
- For added convenience, enable the Print Screen shortcut in Settings. Go to Settings > Accessibility > Keyboard and toggle on Use the Print Screen button to open screen snipping.
Uninstall or Remove the Snipping Application
Corrupt app files may prevent the Snipping Tool from functioning. Reinstalling the app can clear these errors.
- Open Settings > Apps > Installed Apps.
- Scroll to find the Snipping Tool and click Uninstall.
- Restart your computer, then reinstall the Snipping Tool from the Microsoft Store.
🛠️ Helpful Tip: If system clutter or corrupted settings are interfering with built-in tools like the Snipping Tool, try running Outbyte PC Repair. It scans for app-related issues, file path errors, and other glitches that may be preventing tools from saving or launching properly.
Update Snipping Tool App
An outdated app version can cause compatibility issues, especially after a Windows 11 update.
- Open the Microsoft Store and search for the Snipping Tool.
- Click Update if a newer version is available.
- Once updated, restart your computer and test the tool.
Alter Background Apps Permissions
If the Snipping Tool isn’t working in the background, it may not function properly.
- Go to Settings > Apps > Installed Apps.
- Locate the Snipping Tool and click Advanced Options.
- Under Background Apps Permissions, set it to Always.
Enable Notifications
For the Snipping Tool to work seamlessly, notifications must be enabled.
- Open Settings > System > Notifications.
- Scroll to find the Snipping Tool and toggle notifications to On.
- Restart your computer to ensure the changes take effect.
Adjust the Location of Saved Screenshots
Misconfigured save locations can cause the Snipping Tool to fail when saving screenshots.
- Open the Snipping Tool and click the three-dot menu.
- Select Settings and look for the default save location.
- Update the save folder to a valid directory, such as Pictures > Screenshots.
Readers also found these useful:
How to Fix the Error Code 0x80131500 on Windows 10/11 When Downloading a Game
How to Solve Windows Error Code 0xc000000e in Windows 10/11
Getting Error Code 0xc0000409 on Windows? Here’s What You Need to Do
How to Deal with the Activation Error 0xc004f050 on Windows 10/11
Fix Windows Update Download Error 0x8024200B on Windows 10/11
FAQs
Why isn’t the Snipping Tool working in Windows 11?
This could be because the software is outdated, the app files are corrupted, or there is something wrongly set in the app.
How do I reset the Snipping Tool?
Via Settings > Apps > Installed Apps > Advanced options, you click on Reset.
Do any other screenshotting tools exist?
Yes, by using the Print Screen key and third-party apps like Snagit and Greenshot.
Where does Snipping Tool, by default, save the screenshots?
By default, they are saved in Pictures >> Screenshots or the folder you configure in the app settings.
Why does it not open automatically after snip?
This may be due to many reasons, including ill-set options or some bug in the software. Most of the time, updating or reinstalling the application resolves this.