When Windows 10 or 11 system files are corrupted or damaged, it may result in an entire spectrum of system errors, sluggish performance, or even failure to boot. Fortunately, Microsoft has provided Windows with powerful command-line utilities that can detect and fix such problems. One such extremely important utility is Deployment Image Servicing and Management or DISM.
This guide contains all you need to know about the DISM tool: how it works, which commands to use, and how to properly repair your Windows installation with dism.exe /online /cleanup-image /restorehealth and related commands.
What is the DISM Tool?
DISM is an acronym for Deployment Image Servicing and Management, a Windows command-line tool used primarily to prepare, repair, and maintain Windows system images. These include Windows Setup images, Windows Recovery Environment (WinRE), and Windows PE (Preinstallation Environment). For individual users, DISM is most useful when repairing a corrupted recovery image or Windows performance issues.
This utility helps maintain your operating system’s health. It works hand in hand with System File Checker (SFC) — if SFC fails due to corrupted recovery images, DISM comes into play.
🛠Fix Tip: In case you are facing persistent system issues and would prefer a deeper cleaning and repair, use Outbyte PC Repair to delete junk files, repair broken settings, and stabilize system performance alongside running DISM commands.
How to Use DISM to Repair the Windows 10/11 Image
DISM operates through different modes, each suited to a specific task. These include:
- RestoreHealth: Repairs the system image.
- CheckHealth: Quickly checks if corruption exists.
- ScanHealth: Performs a deep scan to detect issues.
It is typically recommended to run these commands in the following order: CheckHealth > ScanHealth > RestoreHealth.
How to Use the RestoreHealth Option
If DISM has detected problems within your image, the dism /online /cleanup-image /restorehealth command can repair them automatically.
Here’s how to do it:
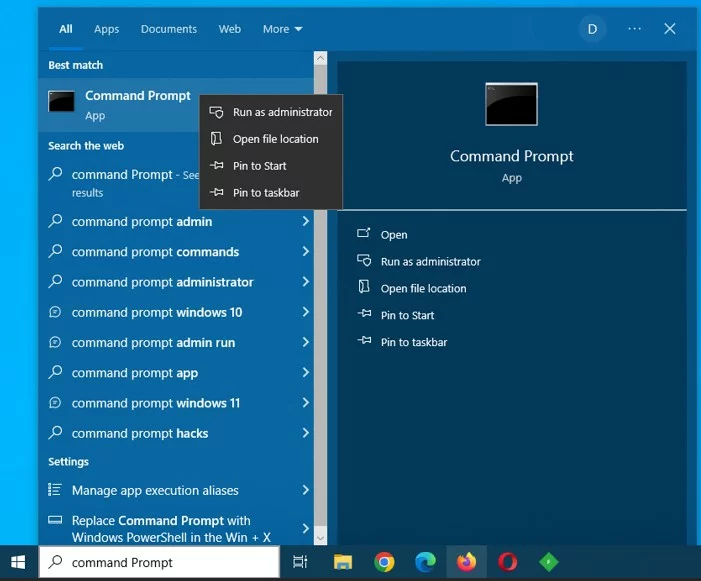
- Click on Start and search for Command Prompt.
- Right-click the top result and choose Run as administrator.
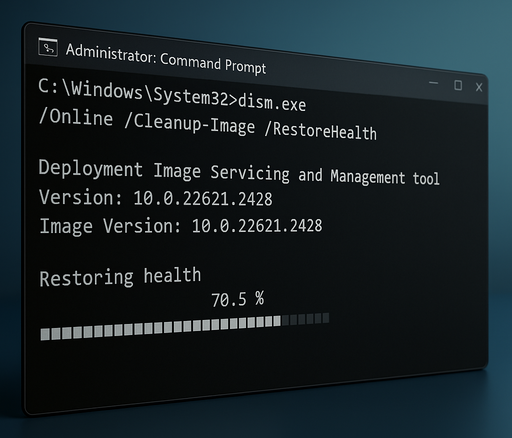
- Type the command:
dism.exe /online /cleanup-image /restorehealth - Press Enter.
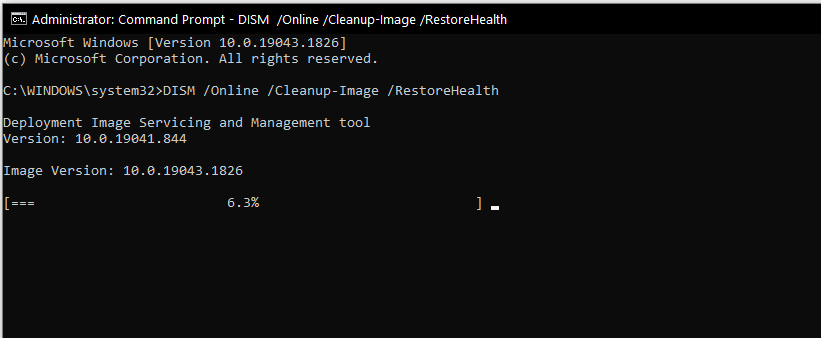
It’s normal for the process to pause at certain percentages. Just wait—it will resume. Once complete, the tool will fetch healthy file replacements from Windows Update and restore the local image.
How to Use the CheckHealth Option
To quickly check for damage in your Windows image (without making changes), use the CheckHealth option:
- Open Command Prompt as administrator.
- Enter:
dism.exe /online /cleanup-image /checkhealth - Press Enter.
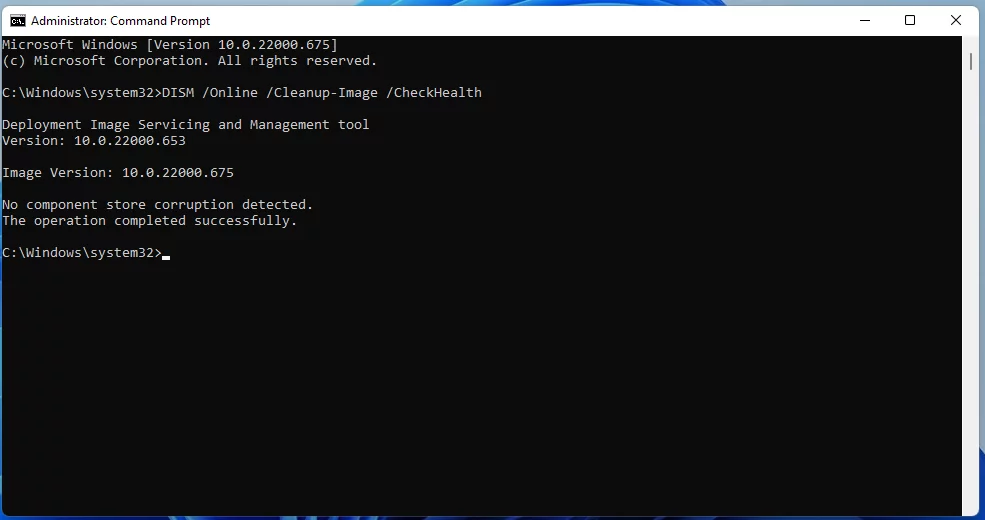
This command checks whether your image has been flagged as corrupted, but won’t fix it.
How to Use the ScanHealth Option
If you want a more thorough scan, use the ScanHealth command. It takes longer but detects even subtle corruption issues.
- Open Command Prompt as administrator.
- Type:
dism.exe /online /cleanup-image /scanhealth - Press Enter and allow the scan to complete. This may take some time.
🛡️ Tip: If your system issues are caused by hidden malware rather than corrupted files, consider scanning with Outbyte AVarmor before running DISM. It helps eliminate threats that might interfere with repair tools.
Comparing DISM with SFC and CHKDSK
Each Windows repair utility has its specific use:
- DISM: Repairs the Windows image itself (
install.wim), especially useful when SFC fails. - SFC: Replaces corrupted or missing system files using the recovery image.
- CHKDSK: Checks disk volumes for physical and logical file system errors.
Running dism online cleanup image restorehealth before using sfc /scannow ensures the system image used for replacement files is intact.
Fixing Issues with DISM Using WIM Image
Sometimes, dism.exe /online /cleanup-image /restorehealth may not work correctly if Windows Update cannot fetch files, especially without internet access. In that case, use a local install.wim file.
How to Download Windows 10/11 ISO File
To get a valid image:
- Go to Microsoft’s official support page.
- Download the Media Creation Tool.
- Run the file, accept the license terms.
- Choose Create installation media (USB flash drive, DVD, or ISO file).
- Select ISO file and save it to your PC.
- Mount the ISO by double-clicking it.
- Note the drive letter from File Explorer.
Repair Windows 10/11 Recovery Image (install.wim)
Once you have the mounted image:
- Open Command Prompt as administrator.
- Run the command (change
D: to your drive letter):dism /online /cleanup-image /restorehealth /source:D:\Sources\install.wim - To avoid using Windows Update:
dism /online /cleanup-image /restorehealth /source:wim:D:\Sources\install.wim:1 /limitaccess
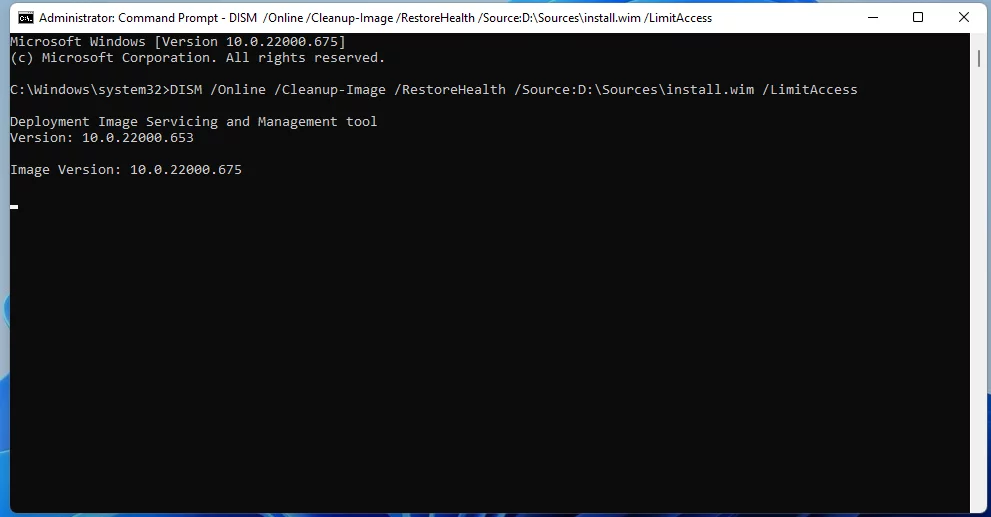
This uses the specified image file to restore system health.
🔧 Pro insight: If DISM fails due to component store corruption caused by outdated drivers, using Outbyte Driver Updater can help keep critical system drivers updated—reducing the risk of errors during recovery.
Repair Problems with DISM Using ESD Image
If you don’t have a WIM image but have a compressed ESD file instead (common with Windows upgrades), you can still run DISM.
- Open Command Prompt as administrator.
- Use this command (replace the path as needed):
dism /online /cleanup-image /restorehealth/source:C:\$Windows.~BT\Sources\install.esd - To skip Windows Update:
dism /online /cleanup-image /restorehealth/source:esd:C:\$Windows.~BT\Sources\install.esd:1 /limitaccess - You can also run it using another drive:
dism /online /cleanup-image /restorehealth /source:D:\Sources\install.esd
This will instruct DISM to use the specified install.esd image to repair corrupted components.
Summary
The DISM tool is a built-in, powerful feature in Windows 10/11 that allows you to diagnose and repair image-based issues within the OS. Whether using Windows Update or a local image file, commands like dism.exe /online /cleanup-image /restorehealth play a crucial role in system repair.
If your PC still lags or encounters frequent system errors, consider pairing DISM repairs with a system tune-up using Outbyte PC Repair to clean unnecessary clutter and optimize your setup for smoother operation.
💡Check These Out Next:
If you’re using DISM to repair your system, you might also find these articles helpful:
What is DISM.exe? How to use DISM ScanHealth
🧠 A beginner-friendly guide explaining what DISM is, how it works, and how to run deeper scans like /ScanHealth.How to Fix a CLOCK_WATCHDOG_TIMEOUT BSOD in Windows 10/11
🧠 Learn how to fix this common BSOD error using system repair tools and updated drivers.Error Copying File or Folder: “The Requested Value Cannot Be Determined”
📁 A step-by-step guide to resolving file transfer errors often caused by system glitches or corrupted components.
FAQs
What does dism /online /cleanup-image /restorehealth do?
It scans and repairs the local Windows image, replacing corrupted files using Windows Update or a specified image source.
Is it safe to run dism.exe /online /cleanup-image /restorehealth Windows 11?
Yes, it’s a safe command that makes non-destructive repairs to the Windows image.
Can DISM fix boot errors?
If the issue is due to corrupted system image files, DISM can help fix boot errors by restoring the integrity of the image.
How long does DISM take to run?
ScanHealth and RestoreHealth can take from several minutes up to an hour, depending on the system and the issue.
Do I need internet for dism exe commands?
Only if you’re using Windows Update as a source. If you use a WIM or ESD file locally, internet is not required.