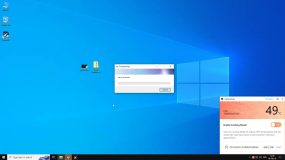
Windows Automatic Repair helps diagnose the problems that aren’t letting your PC start normally. But sometimes it fails due to a software conflict, corrupted files, or malfunctioning hardware components, and then you see the error message “Automatic Repair couldn’t repair your PC.”
Reasons Why Automatic Repair Might Fail
Windows Automatic Repair can sometimes get caught in a loop, continuously restarting but never successfully fixing the issue. Trying to reset the system through Advanced Options doesn’t work, and even running command prompt fixes leads to a dead end.
The exact cause of this issue remains unclear, but it’s often linked to corrupted files or system errors. The problem typically occurs in two ways:
- Automatic Repair gets stuck on a black screen, displaying the “Preparing Automatic Repair” message.
- Automatic Repair fails entirely, showing: “Automatic repair couldn’t repair your PC.”
So, in case that situation arises, here is a step-by-step guide with practical solutions to fix up the problem and restore your system to normal functioning.

Solutions for Fixing Automatic Repair Issues
Before trying these solutions, make sure that you nothing is amiss in the hardware or the usual operations of your Windows computer. This is why it’s very important to get in the habit of using a Outbyte PC Repair tool to clean out junk files and unnecessary stuff that get in the way of your machine’s steady, stable operations.
Now, let’s get to work and work our way down the following solutions:
Reset or Reinstall Windows
As a last resort, reset or reinstall Windows.
- Go to Advanced Options > Reset this PC.
- Choose between “Keep my files” or “Remove everything.”
- Follow the on-screen instructions to complete the reset process.
If the issue persists, you may need to perform a clean installation of Windows.
Disable Your Anti-Malware Software
Disabling Early Launch Anti-Malware Protection may fix the Windows Automatic Repair loop. To do this:
- Restart your computer several times until the Windows Boot Options menu appears.
- Head to Troubleshoot > Advanced Options > Startup Settings.
- Once the system restarts, a list of options will appear.
- Select Disable early launch anti-malware protection.
- Restart your computer and see it boot into Windows.
Remove a Problematic File
Corrupt files are often behind issues like the Automatic Repair loop. Follow these steps to investigate and fix the problem:
- Open the Windows Boot Options menu.
- Go to Troubleshoot > Advanced Options > Command Prompt. In the Command Prompt window, type:
C: cd Windows\System32\LogFiles\Srt SrtTrail.txt - If there is a message saying the file is corrupt, something like, “Boot critical file c:\windows\system32\drivers\vsock.sys is corrupt”, open the Command Prompt and go to the file’s location.
- Use the
delcommand for deleting the corrupt file. - Restart your computer and check if the problem is resolved.
Perform a Clean Install of Windows 10/11
Should Automatic Repair continuously fail, then a clean install of Windows 10/11 may be the solution to this problem. It gets the operating system installed fresh again, removing the installed applications, though it allows you to keep your personal files if you need them to be kept.
Note that running Microsoft’s clean install tool will remove all applications that did not come with Windows, including things like Office or other software installed later. These applications are gone for good and will have to be manually reinstated if desired. Before proceeding, ensure that your system satisfies the Clean install requirements of Windows 10/11.

People Also Ask
How to downgrade Windows 11 to Windows 10
Normal CPU Temperature Range While Gaming and Idle for PC and Laptop
Major Windows 11 vs. Windows 10/11 Differences You Need to Know Before Upgrading
FAQs
1. What causes the “Automatic Repair couldn’t repair your PC” error to appear?
This may be due to corrupted operating system files, a disk error, or malfunctioning hardware.
2. Does the problem allow for repair without reinstalling Windows?
Yes, these issues can be fixed using methods such as BCD repair, running CHKDSK, or Safe Mode, without reinstalling.
3. What happens if CHKDSK finds bad sectors?
CHKDSK can mark bad sectors and stop the system from trying to use them, hence possibly fixing the problem.
4. Should I permanently disable Automatic Repair?
Disabling Automatic Repair is a good troubleshooting tool, not permanent.
5. Which one may be used for system optimization towards its stability?
Outbyte PC Repair would be the best choice since it works on enhancing performance and stability; therefore, it will do just fine to prevent situations from occurring like this one.


